Yoga BLOG

Krounchasana - die Reiher Stellung

Krounchasana - the Heron Pose

by Stefan on Aug 16 2019
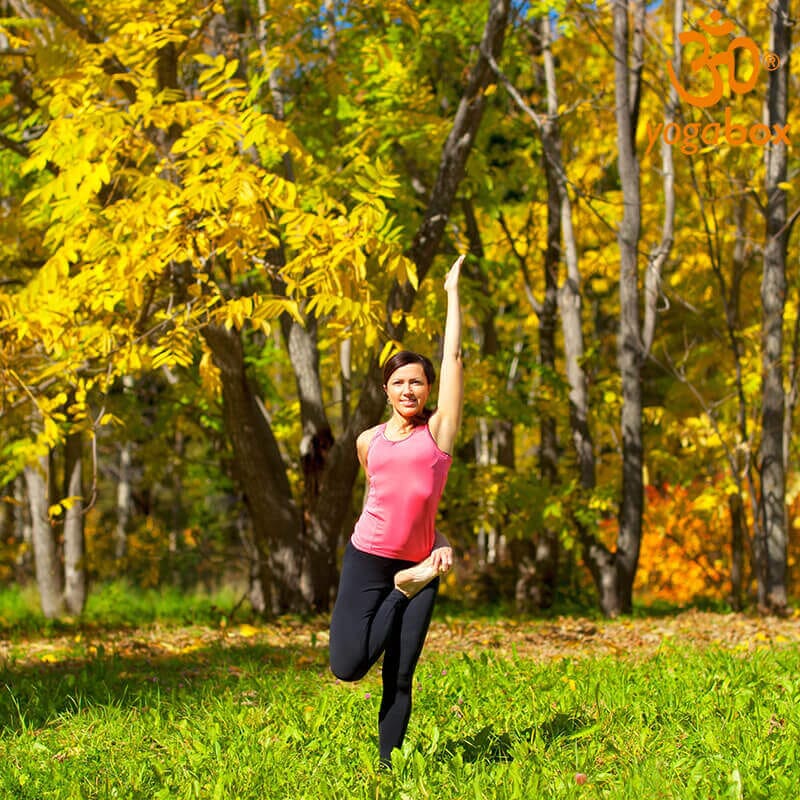
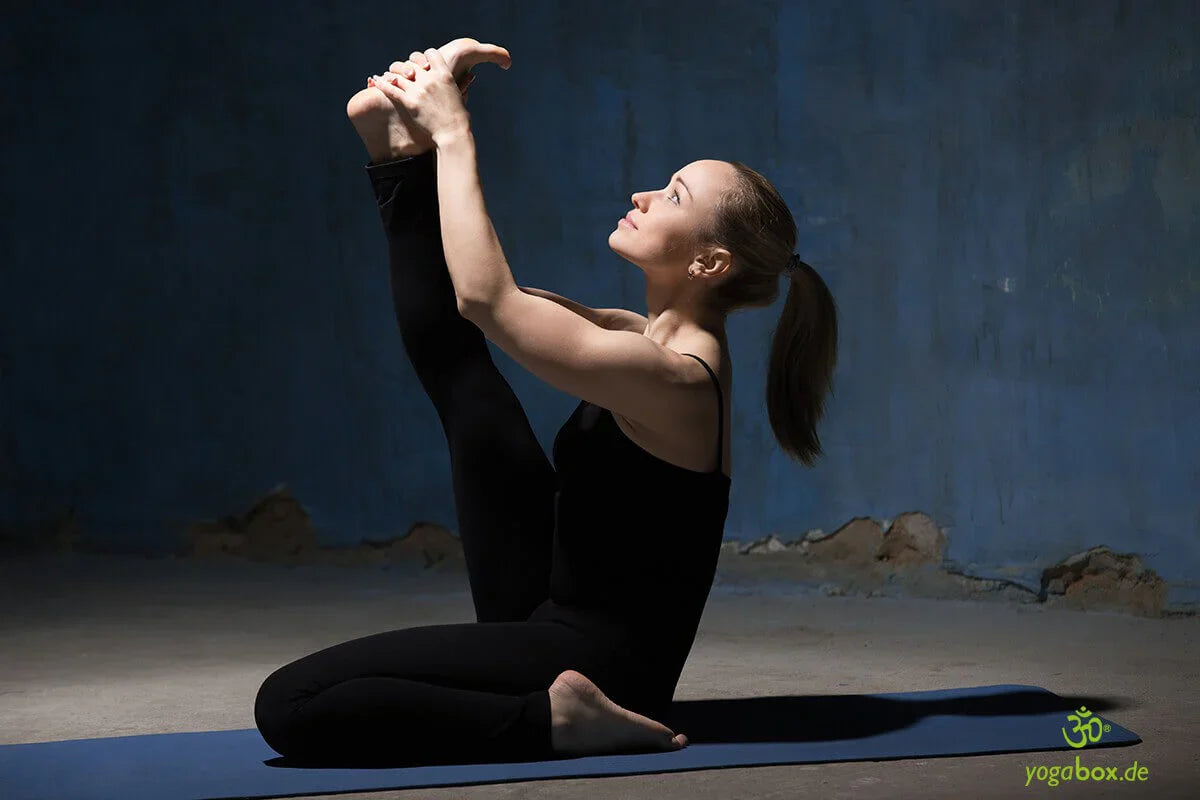
Krounchasana - the Heron Pose The word Krounchasana comes from Sanskrit and is the name of the asana "Heron." Krouncha means "heron" and "asana" means seat. This yoga pose got its name from the resemblance of the vertically raised leg to the outstretched neck and head of this long-beaked and graceful wading bird. Getting into Krounchasana posture step by step To perform Heron Pose, first sit comfortably on your yoga mat in Staff Pose. In Staff Pose, extend both legs forward and bring them together. Bend your feet so that your toes point toward your face. Place your palms on either side of your hips, pointing your fingertips forward. Keep your spine straight and roll your shoulders back slightly, away from your ears. Feel your sitting bones pressing firmly into the floor. Straighten your spine again and begin to bend your left knee. Place your left foot on the floor next to your left gluteus maximus. You shouldn't feel any pain in your knee joint during this movement, so be especially careful when bending your knee. In the next step, bend your right knee towards your chest and grasp your right foot with both hands. Gently push your heel upwards. Then follows the movement that brings you into the heron pose. Extend your leg as far as you can. The goal of the Krounchasana pose is to fully extend your leg with a completely straight spine and continue to hold your foot with both hands. Then pull your shoulders down and back again and lift your chest. Lean back slightly and take at least three deep breaths in this position. Then release from the yoga pose by first carefully bending your right leg and slowly extending it back on the floor in front of you. Only then should you bring your left leg back into the staff pose. Repeat the heron pose on the other side. What you should pay attention to when performing the Krounchasana pose Krounchasana is not recommended for you if you have problems with your knees or ankles. Many beginners make the mistake of rounding their spine in Heron Pose. However, in Krounchasana, your back should be kept completely straight. To achieve this, you can bend your leg slightly instead of extending it straight. If your legs aren't stretched enough, you can also grasp them at the ankle or along the shin instead of bringing your hands together above the soles of your feet. There's also nothing wrong with using a strap or a cloth to slowly straighten your leg. To do this, wrap the band around the ball of your raised foot. Hold the band with each hand on either side. This way, you can slowly stretch it while moving your shoulders back and down. If you are already an experienced Krounchasana practitioner and would like to deepen the exercise, then move your chin towards your raised knee as far as is comfortable for you. The effect of Krounchasana The Heron Pose improves your posture and strengthens the muscles in your hips and core. In Krounchasana, you open your back legs, stretching your Achilles tendon, quadriceps, and calves. At the same time, the Krounchasana pose builds your abdominal muscles. Heron Pose is also said to have a regulating effect on blood pressure and circulation. Image © fizkes / 123rf.com
Der Yoga Frosch - Bhekasana (auch Mandukasana)

The Yoga Frog - Bhekasana (also Mandukasana)

by Nick on Jul 27 2019
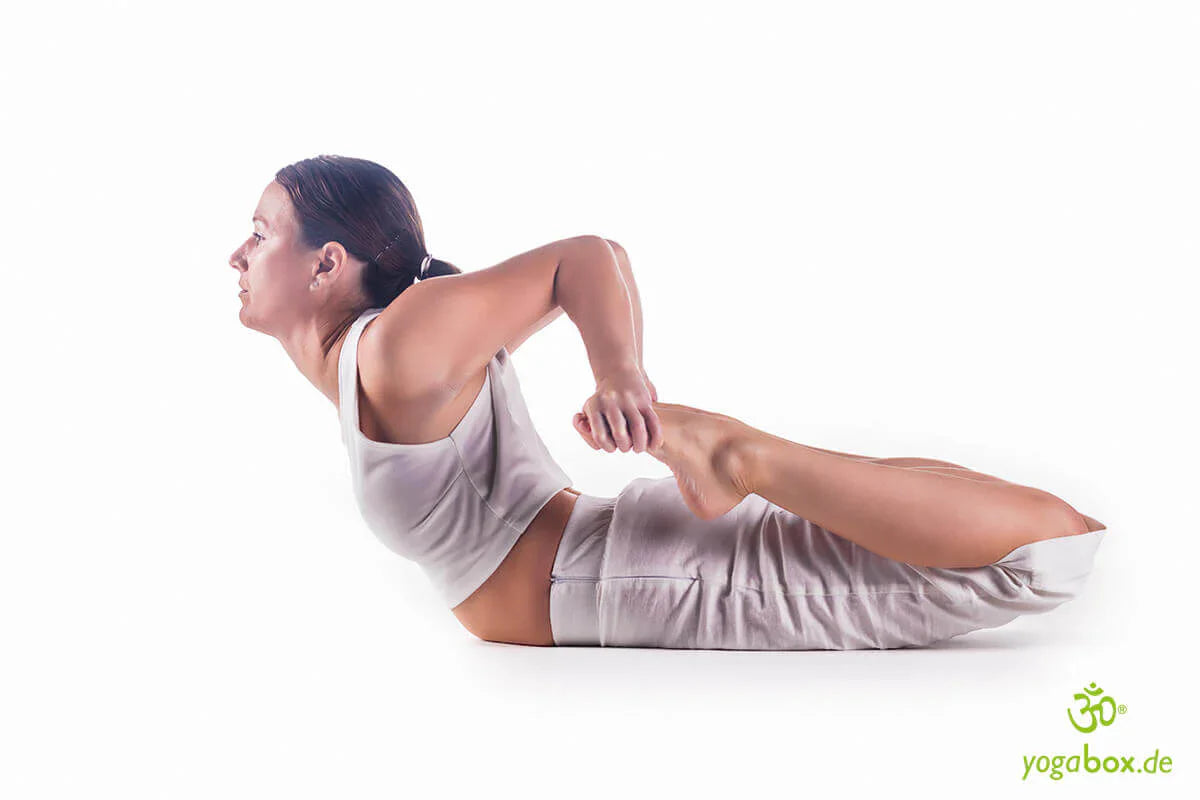
The Yoga Frog - Bhekasana (also Mandukasana) There are two different names for the yoga frog pose: Mandukasana, which usually refers to the kneeling version, and Bhekasana, the lying version. The frog pose is an ideal exercise for opening the lower body, specifically the groin and hips. It also provides a strong stretch to the lower back. Below, you'll learn everything you need to know about the yoga frog pose, how to perform the exercise, what to keep in mind, and what benefits you can reap. How is Bhekasana, the Yoga Frog, performed? First of all, you should find a quiet place that is free from noise or other distractions. To do the exercise, you will need a comfortable mat , two blankets and a yoga bolster . Fold one blanket crosswise, place it on the mat and roll up the other blanket. Place this on top of the folded blanket. Lie face down on the mat. Take your time with this position. Then support yourself on your forearms and breathe in and out calmly and consciously. The distance between your knees should be no more than hip-width apart. Bend your left knee and place your left hand on your left foot. Your elbow should point outwards and be close to your rib cage. Lift your chest and hold this position for three to five deep breaths. Make sure that your breath flows smoothly during the exercise. The exercise opens the hips and groin and has many other benefits. What are the effects of Bhekasana? The yoga frog pose can improve the flexibility of the knees, hips, and feet, making them more mobile and strengthening the knee ligaments, making them more elastic. It can also reduce knee pain. The pose can also strengthen the ankles and relieve heel pain. It also stretches the thigh and buttock muscles, and strengthens the abdomen, lower abdomen, and pelvic floor muscles. Fat from the thighs, abdomen, and hips can be reduced. This yoga exercise also stimulates the stomach and spleen meridians, improving deeper breathing and posture. Positive effects on digestive and menstrual problems have also been reported. The pose can contribute to the harmonizing of emotional and impulsive moods, making Bhekasana a good place for relaxation and stress reduction. The yoga frog pose is even said to help with mild depression. What should you keep in mind when doing Bhekasana? When doing the yoga frog, it's important to pay attention to your breathing, especially when going in and out of the exercise. This has various positive effects, such as a greater reduction in belly fat . In addition to correct breathing and optimal posture, it's recommended to do the exercise on an empty stomach. If you have existing lower back problems or injuries to your hips, shoulders, knees, or stomach, it's important to be careful with the pose. In these cases, it's advisable to consult a doctor whether the yoga frog is advisable or not. The same applies if you have high or low blood pressure or migraines. Conclusion That's everything you need to know about Bhekasana. Viewed from above, the pose resembles a frog lying on its stomach. This gives the yoga pose its name. The focus is on mobility, flexibility, strength, and breathing. The body parts involved are the legs, shoulders, chest, and back. The frog pose is a simple yoga pose that's also suitable for beginners because it's easy to perform. Placing a pillow under your rib cage makes the pose easier. Image © ivanvess / 123rf.com
Parsvottanasana: die intensive seitliche Dehnung genießen

Parsvottanasana: enjoy the intense lateral stretch

by Nick on Oct 29 2018
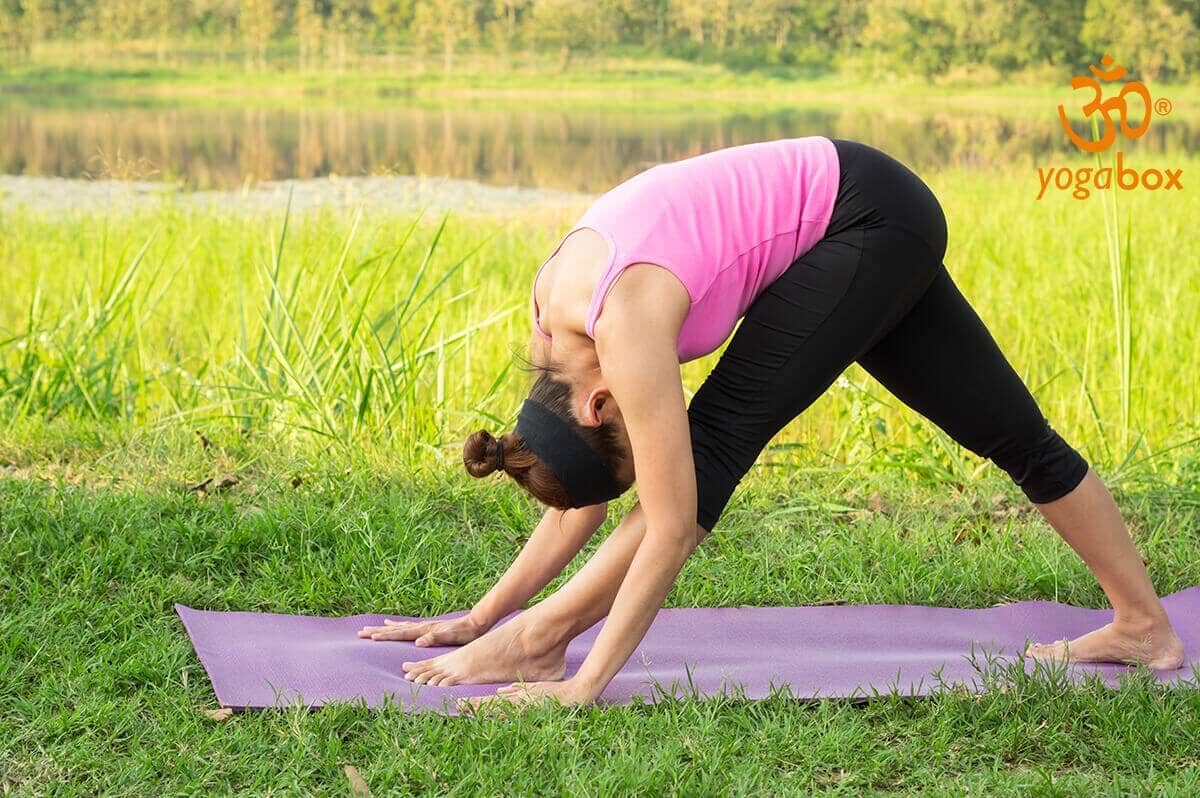
Parsvottanasana: enjoy the intense lateral stretch The pyramid as a structure exerts a divine magic on us and has held an irresistible fascination for its observers for millennia. It's no wonder that the name and the corresponding pose have also found their way into the circle of yoga asanas! The Pyramid Parsvottanasana is one of the yoga exercises in the area of forward bends and provides you with strength, stretching, and flexibility. Here you'll learn everything you need to know about it. How to best perform Parsvottanasana To shape your body into the yogic pyramid, as with many other asanas, you need a secure stance as a foundation. It is best to start in the mountain pose, in Tadasana . Then you place your hands in Namaste , not in front of your ribcage as you may be used to, but behind your body, resting against your back. Get into a stable stride position, turning your front foot outwards and your inner foot slightly inwards. Then you lengthen yourself before you go into a forward bend. Consciously push your legs back while you bend your ribcage well over your front leg. Your forehead should draw towards your shin; you may even want to place it on it. You should hold Pyrmaide Parsvottanasana for about 30 seconds. Then do the same on the opposite side to evenly distribute the strain throughout your body. Aids for a valuable asana This asana will be easier for you if you place your front foot on an elevated surface. You can also initially support your hands on blocks instead of placing them behind your back in Namaste. It's easier to maintain balance in the pyramid pose if your feet aren't directly behind each other, but rather staggered to the side, as if on rails. Your yoga teachers will be happy to help you if you need further individual support. Learn about the effects of the pyramid Parsvottanasana affects the body, mind, and soul, making it a holistic asana that can bring you a variety of benefits. The intense stretch of your flanks activates your spine, and the exercise can also help with lower back pain. The forward bend also massages your abdominal organs, which can noticeably stimulate your metabolism. It also boosts blood flow to the brain, which can have a positive effect on your cognitive abilities and attention. The more you immerse yourself in the asana, the more the heaviness of your body and mind you can release into the floor and relax more and more. The endocrine glands can also be stimulated by the forward bend. This can help if you have thyroid problems, but insomnia can also often be reduced with Parsvottanasana. In addition, the pyramid pose strengthens your leg muscles and core, while simultaneously relaxing your diaphragm. The backs of your legs, one of the most often shortened areas of the body, are effectively stretched in Parsvottanasana. The same applies to your chest, which you open wide by bringing your arms back behind your back in Namaste. This heart opening allows you to breathe better and gives you openness in your interactions with others. Important information about the pyramid In Parsvottanasana, you enter a deep forward bend, which may not be suitable for pregnant women or those with circulatory problems. However, like almost any other yoga pose , you can always adapt the pyramid pose to your needs. The blocks are ideal for this exercise because you can create the exact height you need for supporting your arms. This way, even by changing the pose, you can feel your heart expanding and your sides stretching without exceeding your physical limits. Feel how the pyramid gives you the lightness that you can benefit from in many situations in your life. Image © peerayot / 123rf.com
Parivrtta Baddha Parsvakonasana: der gedrehte seitliche Winkel

Parivrtta Baddha Parsvakonasana: the rotated side angle

by Nick on Oct 26 2018
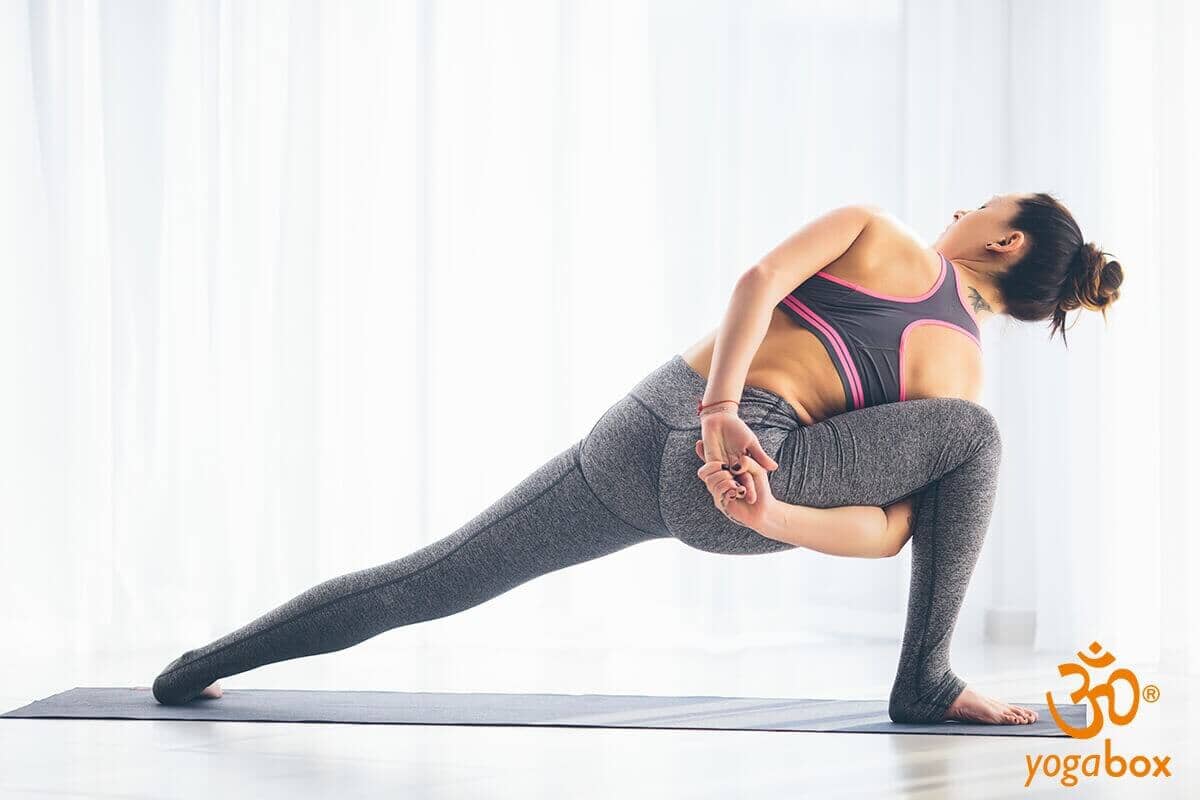
Parivrtta Baddha Parsvakonasana: the rotated side angle It's one of the most graceful yoga poses: Parivrtta Baddha Parsvakonasana is the side-twisted angle pose that combines a soothing twist with a gentle stretch and grounding core strength. As in many other cases, the Sanskrit name well explains what this pose looks like. "Parivrtta" means "twisted," "baddha" means "bound," "parsva" is the side or flank of the body, "kona" is the angle, and "asana," as you probably know, is the word for "exercise" or "pose." Parivrtta Badha Parsvakonasana is a posture in which you twist backward from a wide-stretched stance with your hands tied. This is done by bringing one arm under your front bent leg and the other behind your back. Here you can learn more about the pose, which, due to its complexity, can bring you a multitude of beneficial effects. Experience the effects on body, mind and soul In the twisted side angle pose, as in all standing positions, you build strength in your leg muscles . You also ground yourself to the earth, which supports you. The side twist also strengthens your core muscles, especially those of your lower back. At the same time, the muscles in this area are stretched, as are those on the back of your back leg. Linking your arms also promotes flexibility, which you can put to good use in your everyday life and at work. Parivrtta Baddha Parsvakonasana activates your Manipura chakra . This allows you to strengthen your self-confidence and learn to recognize and appreciate your worth. Fear and negative thoughts can be reduced. Furthermore, the twisted side angle helps you strengthen your power by igniting your inner fire. What you should pay attention to during this exercise In Parivrtta Baddha Parsvakonasana, it's important that your front knee is directly over your foot, which should point slightly outward. You should avoid tilting your knee inward when aligning your knees. Before you twist your torso backward and upward, it's important to be mindful of two things. First, Parivrtta Baddha Parsvakonasana is an exercise that you should practice from a secure standing position. Second, the twist requires length in the body so that your vertebrae have the necessary space during the twist. Therefore, consciously stretch yourself before twisting and perform the twist slowly and with concentration. Accept help The side-twisted angle pose isn't easy for every yogi to master right away. Feel free to take advantage of any adjustments or alternatives your yoga teachers can show you. This includes, for example, not necessarily choosing the bound form at first. You can also rest your upper bent arm on your upper waist and twist in this position. If you're not ready for the twist yet, you can also practice the wide stride pose. You can rest your elbow on your knee if you wish. For more stability in your standing position and thus better balance, you can also place your back foot against a wall. To practice Parivrtta Baddha Parsvakonasana, you can also support yourself in the stride position with your hand on the floor next to your foot and then twist up. If this isn't easy for you, you can also place your hand on a block, adjusted to your needs, and then shorten the distance to the floor for yourself. Your hips should always be straight in Parivrtta Baddha Parsvakonasana and not tilt forward. Therefore, only choose the bound form of the pose if it doesn't pull your hips and upper body upward. Keep your gaze relaxed, and always position your head so that you allow your neck to relax. Then hold the pose calmly and allow your breath to transport the beneficial energy into your body. Image © f8studio / 123rf.com
Parivrtta Trikonasana: sich im gedrehten Dreieck öffnen

Parivrtta Trikonasana: opening in the twisted triangle

by Nick on Oct 23 2018
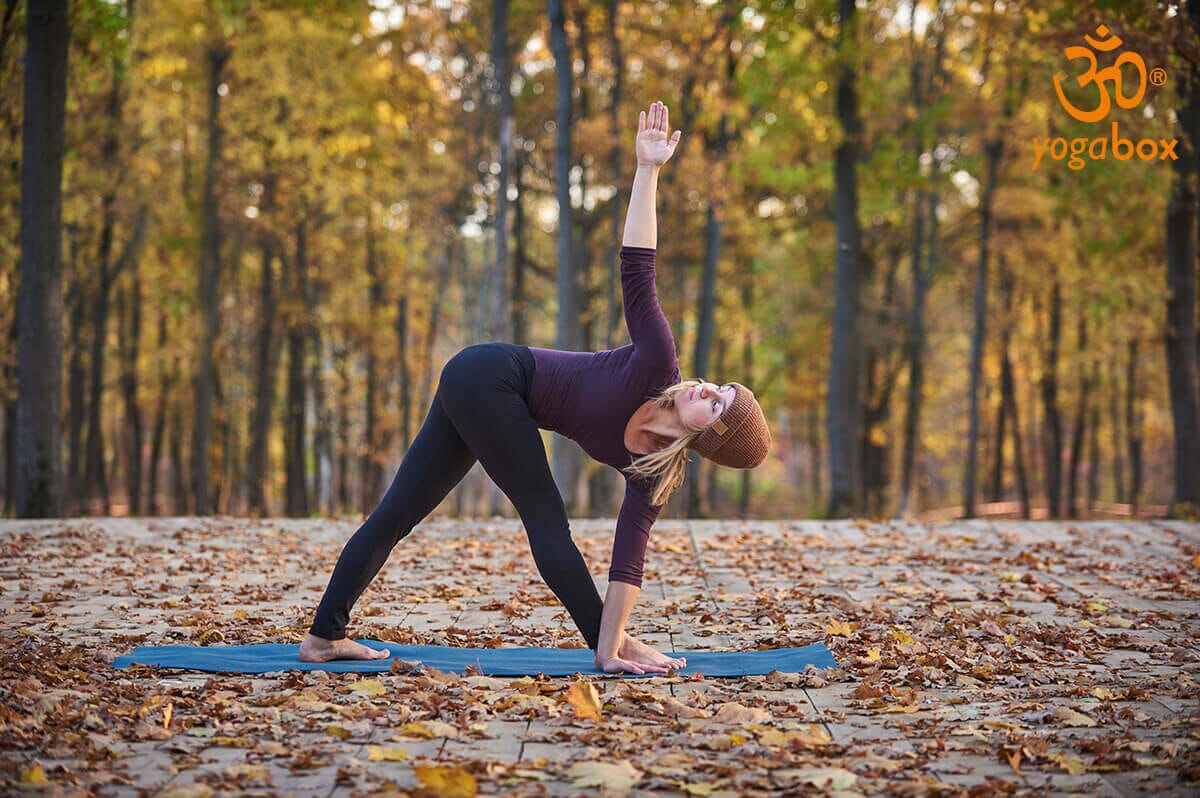
Parivrtta Trikonasana: opening in the twisted triangle The Revolved Triangle is a very graceful yoga pose that can often be easily mastered even by beginners. From a wide stride, the yogi supports themselves with the opposite hand to their standing leg and twists upwards and backwards toward the upper shoulder. Parivrtta Trikonasana combines a standing posture with a twisting pose and therefore has a particularly wide range of positive effects. Here you'll learn everything about the effects of the asana, how to best practice it, and what you should pay particular attention to. Experience the variation of the classic triangle As with many yoga poses, the Sanskrit name pretty much says it all: "Parivrtta" means "twisted," and " Trikonasana " is the triangle pose ("Trikona" means "three angles"). The classic triangle pose is thus enhanced with an additional twist: While in Trikonasana you stand upright with a wide straddle and your arms and hands parallel to the floor, in the twisted pose you assume a wide stride with your front foot turned outward and your back foot turned inward. Place the hand opposite your standing leg on the inside or outside of it, directly next to or on the foot. Grounded in this way, you twist your body and stretch your upper arm upward to the highest point. Learn the benefits of Parivrtta Trikonasana Parivrtta Trikonasana offers you the benefits that all standing poses offer: your legs are activated and strengthened. The rotation brings you a whole host of other advantages. Firstly, of course, the opening that gently embraces your hips, especially your ribcage, allowing you to breathe more freely. Secondly, it mobilizes your hips and spine, giving you greater mobility in these areas. The stretch in the abdominal area stimulates your internal organs and encourages their function. In addition, it strengthens your back; for the harmony of this, you should always do the rotated triangle on both sides. Furthermore, Parivrtta Trikonasana, as you will notice the first time you practice it, is a good way to improve your balance. What you need to consider As with all other yoga asanas, you will only experience the beneficial effects of the Revolved Triangle pose if you perform it correctly. This is especially true for the twist in the lower back area. This must be done from the length of your spine, so you should consciously maintain a straight back with the crown of your head drawn forward before assuming the twist. It is also important not to immediately extend your upper hand upwards. You can place it at your waist with your arm bent so that you can concentrate fully on the torso twist. Only then does the upward arm follow the movement. Helpful Parivrtta Trikonasana is often considered difficult by beginners because placing your hand on the floor with straight knees isn't always easy right away. You can use a block to help, rotating it so that it's at the right height for you to practice at. You can also keep your upper hand on your waist and skip extending your arms at first. It's much more important to keep your pelvis straight and not tilt it. If stability in the rotated triangle pose is a problem, you can place your back foot against a wall to positively influence your stance and balance. As with all yoga poses, make sure you breathe freely in Parivrtta Trikonasana, which you can hold for up to one minute. Important: Avoid Parivrtta Trikonasana during pregnancy or if you have severe lower back problems. Low blood pressure can cause dizziness, so be careful when exiting the pose. Your yoga instructors will always have personal alternatives for you. Image © sandsua / 123rf.com
Ardha Padmottanasana: Gleichgewicht im halb gebundenen Lotus finden

Ardha Padmottanasana: Finding balance in the half-bound lotus pose

by Nick on Oct 19 2018
Ardha Padmottanasana: Finding balance in the half-bound lotus pose Ardha Padmottanasana is a soothing hip opener that even beginners to yoga can often master quickly. Here, you'll learn how to assume half lotus, which other exercises it can be combined with, and what benefits you can stimulate in this pose. Half of the Lotus The lotus position is one of the classic asanas in yoga and is a frequently practiced posture in all styles. It's used not only to experience the physical benefits, but also as a position in which you can meditate or perform breathing exercises (pranayama) . For Ardha Padmottanasana, place one foot on the thigh of the other and pull it close to your pubic bone. The combination with other poses Half Lotus doesn't necessarily have to be performed while seated, even though it's one of the classic yoga poses. You can also do it standing and use the tree poses as preparation for this balancing asana. From a standing position in Half Lotus, you can also perform a forward bend (Uttanasana) . While seated, you can decide whether to bring the other leg toward your body, also bent, or stretch it out. You can also see this in Ardha Padmottanasana: There are ways in yoga that can accommodate you individually and gently push your limits, but never exceed them. The effects on body, mind and soul The effects depend closely on the postures you combine with half lotus. Generally speaking, Arha Padmottanasana is always a good hip opener, activating the flow in the groin and giving you an upright and thus healthy posture. Standing, half lotus is a good exercise for your balance. This also applies to your inner balance . Combined with the forward bend, your internal organs are massaged, thus stimulating their function. In standing, the leg, which is grounded to the floor, is also strengthened. In the psychological realm, the effect of the half lotus pose can be further intensified with pranayama or meditation. In both, you can experience harmony that allows you to find peace and carry you through the often hectic pace of everyday life. The upright posture promotes lung function, and the efficient breathing makes you calmer. At the same time, it prepares you for meditation , where your mind can calm down and your soul can recharge. Meditation in Ardha Padmottanasana is something you can also easily practice at home. Related exercises In Western cultures, the cross-legged position is often seen as a precursor to Ardha Padmottanasana, as in our world dominated by computers and television, we are often very inflexible in the hip area. The cross-legged position is a good exercise for consciously assuming an upright posture with bent legs and for getting used to the lotus pose. The path from half to full lotus is often not that far. The important thing is to really let go in the pose and to gradually ease into a position that may initially be uncomfortable, also with the help of breathing control. However, stabbing pain in the knee is always a sign to discontinue the yoga practice. Your yoga teachers will be happy to recommend an alternative that better suits your individual needs. Consider contraindications for Ardha Padmottanasana Contraindications for Half Lotus include knee problems, especially those affecting the meniscus and ligaments. If you have hip problems, you should discuss Ardha Padmottanasana with your doctor or treating physician beforehand. A break is also advisable after a hernia or appendectomy. During pregnancy, it's also important to listen sensitively to your body's specific condition. If you have foot problems, you may find that your foot is better placed on the floor than on your thigh. Just experiment and see how far you can and want to go. Every day is different. Image © sergeyp / 123rf.com

Tolangulasana: Finding balance in the scales

by Nick on Feb 19 2018
Tolangulasana: Finding balance in the scales Tolangulasana is the balance pose. It is one of the balancing poses that casts a fascinating spell just by looking at it. The effect lives up to its name: balance, equilibrium, and balance, both internally and externally, await you. Here you can learn more about this pose full of beauty and grace. The exercise in view In Tolangulasana, the body resembles the shape of a scale. One scale is formed by the upper body and head, which reach diagonally upwards. The other scale is formed by the legs, which are crossed in the lotus position and also lifted from the floor. The pelvis rests on the hands, providing grounding to the mat. The forearms and elbows rest on the floor, providing stability. The effects on body, mind and soul The name "Libra" already speaks to the balance this exercise provides. You feel grounded from below and protected from above. Through the balance this exercise provides, the equilibrium of your limbs, you experience a harmony that carries you through the day. Tolangulasana is also a very effective exercise physically. The muscles of the shoulders and arms are particularly strengthened, as they support you in this pose. By drawing in your stomach and pulling your head toward your chest, your abdominal and chest muscles are also strengthened. By contracting your abdominal muscles, the balance pose also affects your internal organs. The pressure created by contracting your stomach and limiting your legs and upper body gently massages the internal organs. This can be helpful, for example, if you suffer from bloating or constipation. What is the best way to practice the scales? For the Libra pose, you need arm strength and flexibility in your hips and knees. You can initially train both separately from this pose. Arm strength can also be achieved in Downward-Facing Dog or Cobra Pose , for example. You can train hip flexibility in the Swan pose, for example, which is practiced in Yin Yoga. Lotus pose is also a good way to prepare for Tolangulasana! What is the best way to perform Tolangulasana? First, assume the lotus position (Padmasana) . Then, lean back until you're in Matsyasana, or fish pose . Then, align yourself and assume the balance pose, which you hold for a few breaths. When you tuck your chin toward your ribcage in this position, you're in Jalandhara Bhanda . This chin lock is an important practice in pranayama. It's about holding the energy in the important area of the head and neck for a while. You'll find out if you experience any beneficial effects. If not, it's simply not the right time yet, and you can try it again later. Do what feels good! Contraindications for Tolangulasana You should avoid using the scale if you have any injuries or discomfort in the shoulder or arm area. You should also avoid knee or meniscus problems, as the knees are bent sharply. Hip problems are also contraindicated. Furthermore, you should not be pregnant due to the abdominal pressure and pressure on internal organs. In all these cases, you can ask your yoga teachers for advice. They have alternatives that will meet you exactly where you are in your practice and health. This is what defines yoga and makes it a practice for everyone! Image © djvstock / 123rf.com

Dvi Pada Koundinyasana: A yoga pose in honor of Kaundinya

by Nick on Aug 30 2017
Dvi Pada Koundinyasana: A yoga pose in honor of Kaundinya This yoga pose is recommended for beginners and advanced practitioners. Those with no yoga experience should still practice a few other poses before attempting Dvi Pada Koundinyasana. The pose involves both legs, is ideal for transitions, and works the entire body. The legs and arms, torso, chest, and back are primarily involved in the exercise. No equipment is required. Performing Dvi Pada Koundinyasana: Preparation For this asana, all you need is your yoga mat , plenty of arm strength, and sufficient tension in your thighs. During the exercise, your body weight is supported by both arms, while your palms rest flat on the floor—similar to classic push-ups, for example. What makes the exercise even more challenging is the tension required in your legs. Because they are raised sideways and held in the air, the muscles in your thighs and abdomen are strongly engaged. At the same time, the body is rotated by raising your legs sideways. This creates a strong "twist," which you will feel specifically in your chest, abdomen, hips, and back. The challenges of Dvi Pada Koundinyasana are quite diverse. When performing the pose, make sure your shoulders are kept level and level. At the same time, keep your chest open and your breathing even. With each step, be careful to resist the temptation to shift more weight onto your outer hand. Dvi Pada Koundinyasana also represents finding inner balance, which is why both wrists and arms should be equally loaded. Four steps for your Dvi Pada Koundinyasana First, squat down with your fingertips touching the yoga mat on the left and right sides, and your body supported by your feet. If this feels comfortable, you can stand on your tiptoes in this squatting position. Your back will be slightly curved forward, with your knees pointing slightly upward. Now take your right hand and place it behind you, while simultaneously taking your left arm and stretching it upward. Extend your left hand and its fingers steeply toward the ceiling or sky. During this position, your knees will move steeply forward. Now bring your left hand down and place both hands at your sides. This creates a "twist" in your body, as your knees continue to point forward while your hips and torso rotate to the right to position both hands flat on the mat. Now move your feet, keeping your palms supporting you. Release the "twist" in your body slightly as you point your toes slightly forward. This movement prepares you for the next step: raising your legs to the sides while supporting your body with your arms. Breathe in and out calmly, then slowly raise your legs, still tucked in. They, along with your buttocks, should be the highest point of your body. Once you've found your balance, extend your legs to enter the final position of Dvi Pada Koundinyasana. If you feel secure in your posture, you can hold it for a few breaths. However, if you feel like your arm strength is about to leave you, return to your original position. Over time, you can increase the length of time you hold the final position of Dvi Pada Koundinyasana. The focus of this exercise is clearly on strength, breathing, and flexibility. Dvi Pada Koundinyasana is said to bring you inner balance and may have a calming and detoxifying effect. Image © fizkes / 123rf.com

Visvamitrasana - The path to the balancing side angle

by Nick on May 18 2017
Visvamitrasana - The path to the balancing side angle Visvamitrasana is an advanced pose that combines challenging balance with a positive body awareness. This balancing side angle pose, as it's known in German, is intense, challenging, and one of those poses that requires not only flexibility but also support. Here you can find out how to get into the side angle, how to prepare yourself and what advantages the position offers you. Work for head and body - Visvamitrasana in application Physically, this asana offers many benefits, but it also requires strength, coordination, and a willingness to fall. This can certainly happen when preparing for the balancing side angle. Visvamitrasana simultaneously opens the hips, stretches the Achilles tendon and thigh, and improves balance and arm support—all while opening your torso through the twist. Due to the intense stretch, Visvamitrasana should be avoided if you have existing injuries or impairments of the wrist, leg muscles or hip socket. Asanas that are good for preparation include Hanuman, Prasarita Padottanasana , or Vasisthasana . A certain ease in the side plank and flexibility in the thighs are essential for achieving the correct position on your own. From there, it's only a short path to proper balance. In addition to the physical benefits, Visvamitrasana also allows you to train your entire body's coordination and increase strength, patience, and balance. Design and position First of all, you should make sure that you have warmed up sufficiently before starting the exercise; this is the only way to ensure the necessary flexibility and integrity of the muscles. First, take a wide lunge forward with your right foot, allowing you to slightly twist your left foot. Now bend your right knee slightly and press your right shoulder against your right inner thigh. Stay in this position for a few breaths, gently rocking your hips back and forth to prepare your muscles and joints. When you feel flexible enough, bring your right shoulder under your front knee. With your right arm, reach around your shin and onto the outside of your foot. Your hand should touch the floor, as should both of your feet. Remain in this position for a moment and then shift your weight back and forth between the support points, slowly shifting the force to your right hand, away from your front foot. When there's barely any weight left on your right foot, lift it off the floor and bend your leg. Transfer your foot to your left hand—you can rest your weight on your upper arm during this process. Grasp the outside of your foot with your left hand and begin to straighten your leg. During this phase, maintain good posture, pull your shoulder blades back, and rotate your biceps and elbows toward the mat. By slowly extending your leg, you now also stretch your side ribs, make sure that your head naturally lengthens your spine and turn your left elbow towards the ceiling to open your upper body. After taking a few breaths in Visvamitrasana, slowly bend your front leg back and lower your foot to the floor. Repeat the exercise on the other side. Visvamitrasana - The exercise alone is reward enough The asana Visvamitrasana is one of the more challenging positions and will require a lot of practice before you can hold the position cleanly and for a longer period of time. Visvamitrasana is extremely rewarding, and simply performing the pose correctly is a deeply satisfying feeling. By opening your ribs, stabilizing your arms, and stretching your legs, you can sustainably improve your body awareness and coordination. You'll probably experience firsthand that Visvamitrasana is a real balancing act a few times. Landing on your bottom isn't an uncommon side effect, but performing it correctly is more than rewarding. Image © byheaven / 123rf.com
Eka Pada Shirshasana - Fuß hinter dem Kopf

Eka Pada Shirshasana - Foot behind the head

by Nick on May 12 2017
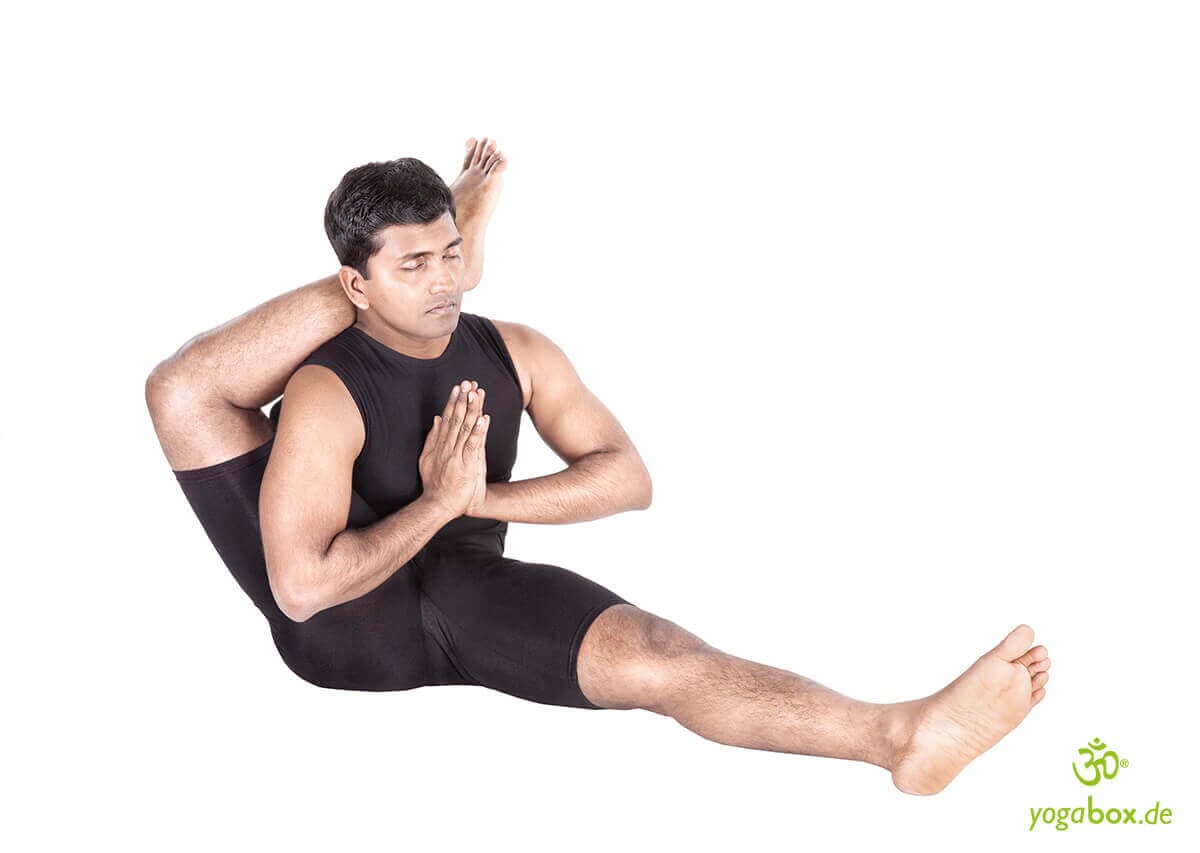
Eka Pada Shirshasana - Foot behind the head Eka Pada Shirshasana not only looks elegant, but is also one of the essential yoga exercises that promotes mobility and flexibility of the hips. The Eka Pada Shirshasana pose involves placing the foot behind the head. This exercise has many benefits and can be easily performed even in a small space, but it also requires a great deal of flexibility and a certain amount of patience. The execution of Eka Pada Shirshasana The starting position is Dandasana with your legs stretched out. Make sure your lower back is straight and that you're sitting evenly on your sitting bones. First, bring your right leg toward your body, bending your knee outward. This opens your calf toward your body. Grab the sole of your foot with your left hand and the inside of your calf with your right hand. While pulling your foot toward your head with your left hand, extend your leg with your right hand. Roll your butt into the floor and straighten your back as you pull your leg into a vertical position. Holding this position, grab your lower leg with your right hand and your ankle with your left hand over your foot. By pushing your shoulder forward slightly and simultaneously twisting your leg, pull your lower leg behind your head. The movement should originate in your hip and not be caused by pulling on your foot. If your foot is behind your head, straighten your head and thus complete the leg stretch. You can initially stabilize your foot with your left hand. Finally, you should release the foot. Breathing calmly and with control in this position will help prevent cramps. Once you have reached the final position, concentrate on your balance and calm breathing - now repeat the exercise analogously on the left side. As a beginner, you can also try Eka Pada Shirshasana lying down. Here, lie flat on your back and follow the execution as usual. If you reach your limit, hold the leg in the position and allow your body to sink deeper into the pose with your breath. If your knees reach the floor, you'll have a good starting position to attempt the correct execution. A position for advanced and professional players Don't worry: Eka Pada Shirshasana is often a difficult exercise even for advanced yogis, as it requires a high degree of flexibility, stability, and calmness. In addition to several months of yoga experience, you should also work specifically on stretching your outer thighs and hips. Forward bend poses (like Supta Padangusthasana) will help you slowly build the necessary flexibility. It is also completely normal that you do not have the same mobility in both legs. The foot behind the head position is extremely intense, but if the intensity turns into pain, you should definitely stop. These are the benefits of Eka Pada Shirshasana Due to the strong stretch during this position, Eka Pada Shirshasana helps you achieve high mobility in your back, hips and legs. Because the foot is above the head, you can also achieve better blood flow, boosting circulation and digestion. People who suffer from tremors and nervousness can benefit from Eka Pada Shirshasana. Instructions for implementation Because Eka Pada Shirshasana is such an advanced pose and requires a lot of control and flexibility, you should avoid it under certain circumstances. Injuries to the knees, hips or spine can flare up again when performing the exercise. Under no circumstances should you "force" yourself into the pose prematurely—Eka Pada Shirshasana requires practice and patience. Progressing too quickly or working with cold, unstretched muscles can lead to overstretching and injury. A perfect exercise Eka Pada Shirshasana is one of the most challenging and beautiful poses in yoga. The practice requires balance, calmness, flexibility, and a high degree of discipline—but Eka Pada Shirshasana gives you just as much in return. Image © byheaven / 123rf.com

Mayurasana Peacock - Yoga for the Digestive System

by Nick on Apr 21 2017
Mayurasana Peacock - Yoga for the Digestive System When it comes to digestion, Mayurasana is a good exercise for stimulating the digestive organs. If you lack appetite, it can awaken your sense of hunger and stimulate the digestive fire. Mayurasana can also help burn belly fat. Sometimes undigested food remains in the intestinal tract; the peacock pose can also be helpful in digesting these and counteracting hyperacidity and unpleasant constipation. Often the result of too little exercise and eating too much fat, digestive problems are unfortunately very common today. This exercise can also have a preventative effect on inflammation of the stomach (gastritis), the colon, and hemorrhoids. By practicing Mayurasana regularly, you reduce excess ama and thus remove harmful toxins from your body's system. How does this stimulation work through regular exercise sessions? The three principles of Vata, Pitta, and Kapha represent the problems that can arise around digestion. Mayurasana can have a soothing and reducing effect on your body. The positive effect is created by the pressure on the abdomen when performing the exercise. Important organs such as the pancreas, liver, bladder, spleen, and gallbladder, as well as the prostate, can be positively influenced by the practice. Mayurasana is also a good way to prevent health problems associated with potential risks such as kidney stones or irritable bowel syndrome. Among the possible positive effects of this exercise are the promotion of circulation and the purification of the blood. The peacock pose is also popular and often recommended for diabetics. Less stress and more sexual energy through Mayurasana A positive effect of regular practice is not only strengthening the arm muscles; peacock pose can also increase sexual energy . Possible effects in women include reducing blood congestion within the vagina. In men, the practice of Mayurasana can prevent impotence and cure erectile dysfunction. The pressure on the abdomen can also help relieve menstrual cramps and positively influence male fertility. If you incorporate peacock pose into your exercise routine and practice it regularly, you can also minimize everyday stress levels. This form of relaxation will refresh your brain, and you'll be able to concentrate better. Mayurasana is therefore also recommended for depressive disorders. Instructions for implementing the technology In Sanskrit, the term "Mayura" means "peacock," because when practiced, it resembles a peacock doing a cartwheel with its magnificent feathers. Find a comfortable spot and kneel on a blanket on the floor. Both arms should be close together, palms facing down. The position of your fingers is also important; they should point toward your feet. For better balance, it helps to keep your fingers slightly curled. Only when your forearms are secure and firm can you support your full body weight on your elbows. Then stretch out both legs and place your toes on the floor. Now it is very important to breathe in very deeply and, with feet and knees pressed together, slowly raise the legs horizontally. Your entire body should be parallel to the firm surface. Duration of the exercise: approximately five seconds. This is followed by the exhalation phase in which you place your toes back on the floor. If you want to do other yoga exercises after practicing Mayurasana, you should take a few minutes break so as not to overtax your body. In addition to the strongly activating effect, the peacock pose also helps you train various muscle groups in the body. A particularly good time to practice Mayurasana is in the morning. The chakras addressed here are Manipura and Ajna . Image © fizkes / 123rf.com

Pincha Mayurasana - forearm stand

by Nick on Mar 31 2017
Pincha Mayurasana - forearm stand Pincha Mayurasana is a yoga exercise that exudes lightness and elegance. As the name suggests, this forearm stand turns the yoga world on its head. Getting into this asana isn't easy at first. It requires some determination and patience. There are a few tips and tricks for performing this empowering asana. These are explained in the following guide. You'll also learn what to pay attention to and who the exercise is suitable for. What does Pincha Mayurasana mean? Pincha means "feather" and Mayura means "peacock," which is one of the world's most admired birds. Pincha Mayurasana thus represents the elegant "Peacock Feather Pose." The many eyes of the feathers are represented in this pose by your third eye. This impressive pose, named after India's national bird, represents beauty, splendor, and pride, and this is precisely what it embodies. The asana is also frequently practiced in children's yoga . The forearm stand, like the handstand, requires considerable body control and balance. How does Pincha Mayurasana work? The starting position is in the heel seat , in the middle of the yoga mat . Bend forward and place your forearms parallel to each other on the floor. With your palms flat and your fingers spread, your elbows are at the same height. Straighten your knees so that your buttocks are pointing towards the ceiling. Place your feet parallel to each other. With your legs straight, move your feet forward until your upper arms and shoulders are vertical. Look towards the floor. Keep your jumping leg on the floor. Swing your foot and pull your legs up one after the other. Your toes are stretched out and pointing towards the ceiling. Stretch your hips and tense your abdominal muscles. Your upper and lower body form a line. It is enough to hold your balance for a few seconds before you slowly lower your feet towards the floor, one after the other. You will be sitting in the heel seat again at the end and you will feel the power. What effects can you achieve with Pincha-Mayurasana? Forearm stand is one of the inversion poses. The usual perspective is turned upside down. Due to the pressure of the elbows, the main artery is compressed. This leads to increased blood flow. The shoulders and arms, as well as the liver, stomach, and pancreas, can be strengthened. The spine becomes more flexible and stretched, especially the thoracic vertebrae. Furthermore, the asana opens the chest, can instill confidence and strength, and can help combat stress and anxiety. What should you keep in mind when doing Pincha Mayurasana? You perform Pincha Mayurasana on a yoga mat. It's a slowly building yoga pose, so jerky and hasty movements from the legs should be avoided. Forearm Stand is all about gentle and flowing movements. You should warm up a bit beforehand. During the exercise, the energy comes from the fingers and hands. It flows through the arms to the entire body. Conclusion The yoga exercise Pincha Mayurasana is ideal for gaining strength in the abdominal, neck, and back muscles, as well as strengthening the shoulders, knees, pelvis, and legs. It also helps you develop your balance and self-discipline. Forearm stand, you need strength in your arms. If you struggle at first, be patient, as it's a matter of practice, determination, and strength. Regularly practicing Pincha Mayurasana will lead to success. Balance and a strong core are important. Image © fizkes / 123rf.com

Malasana - Garland Pose - Deep Squat

by Nick on Mar 08 2017
Malasana - Garland Pose - Deep Squat Malasana is also known as garland pose or deep squat. This yoga exercise offers various benefits, which you'll learn about in the following guide. You'll also receive useful tips on how to best perform it. The asana is also suitable for prenatal yoga, or pregnancy yoga. How is Malasana performed? First of all, you should warm up beforehand. Place your hands in prayer position (Anjali Mudra) in front of your heart. Inhale and then come into a deep squat. Your feet should be hip-width apart, your hips and groin should be slightly more open, and your pelvis should hang down with your entire body weight. If you can't get your heels to touch the floor, you can place a rolled-up towel underneath them to keep them in the air. Although you should keep your feet flat, keep your body weight on your toes if possible. Bring your elbows in front of your knees and your hands in front of your chest. Now bring your upper body towards your legs, looking straight ahead. Take about five calm breaths before returning to a standing position. What effects can you achieve with Malasana? Malasana is an ideal exercise, especially for pregnant women, to promote pelvic mobility and improve blood circulation to the area. Regular practice can make childbirth easier. Non-pregnant women and, of course, men also benefit from it. The ankles, calves, and lower back can be stretched, and the lower back also relaxes. Furthermore, the asana helps strengthen the abdominal muscles and open and increase mobility in the hips and groin. The deep squat also boosts the metabolism, stimulating digestion and preventing constipation. The intestines can be brought back into their ideal rhythm, thus optimizing metabolism. You can also strengthen your balance through the Garland Pose. The energetic effect of the asana is also very noticeable. Since Malasana induces a feeling of calm, it is important that you truly immerse yourself in the deep squat. What should you pay attention to when doing Malasana? Correct execution of the exercise is very important to reap its positive health benefits, but there are a few tips. If you feel tired in the pose, for example, you can shift your body weight onto your heels and then back onto your toes. The deep squat has various positive effects, but the asana is not suitable for everyone. People suffering from serious knee injuries should avoid this pose. If you have minor knee problems, you can also sit on several blocks to relieve pressure on your knees. You can place your feet slightly wider or closer together to find the distance that suits you best. If you have lower back problems, you should consult a doctor or yoga teacher , or try the asana with the latter. Conclusion This is the useful information and tips about Malasana. This yoga exercise is ideal not only for pregnant women due to the numerous benefits that can be achieved with correct and regular practice. To maximize the effect of the deep squat, it is recommended to lie on your back at the end, place your feet on the floor, and let your knees collapse. Close your eyes, place your hands on your stomach, and breathe. You will notice how good this feels. For beginners, practice is worth it. It is important to take the time to get to know your own body and get used to positions like the deep squat. Image © fizkes / 123rf.com

Pashasana: The Noose of Samsara

by Nick on Feb 28 2017
Pashasana: The Noose of Samsara Pashasana (sometimes also "Pasasana") is a continuation of the word "pasha," which means "rope," "fetter," "noose," or "trap." "Asana," on the other hand, means "posture," "seat," or "position." The term is therefore used for anything that is intended to bind the soul and thus binds oneself to the cycle of rebirth (samsara). Pashasana is a pose in which the body is formed into a loop. To achieve this "loop of rebirth," the arms are wrapped around the legs and back. Performing the Loop of Samsara This exercise is especially recommended for advanced practitioners. When performing the pose, ensure that you reach the looped position slowly. Breathing should also be considered with each step, and this becomes important not only in the final Pashasana pose. Inhale after each movement listed here, then exhale with the subsequent movement. At the beginning of the exercise, raise your arms to the sides, spread your fingers, and point them toward the floor. Inhale and then exhale. Squat down and try to find your balance. In the squatting position, lower your feet. Your bottom is now off the floor, and your knees are pointing towards the ceiling. Now reach around your knees with your right arm and cross them so that your right arm is touching your outer right thigh. You can tell if the twisting movement is correct when the outside of your hand touches the outside of your thigh. This means that your arm, including your shoulder, is turned very far. During this phase, you can use your left arm to support yourself so that you don't lose your balance while squatting. After inhaling and exhaling several times, you can then move into the final Pashasana pose. To do this, raise your left arm, which has been supporting you so far, and bring it behind your back towards your right arm, which is still in contact with your thigh. The goal is for both hands to touch, so that you are essentially "shaking hands." For this to work, your left arm must also be twisted widely. Your entire upper body automatically moves to your left. Your chest will then rest next to your left leg. In this position, you can then grasp each other's wrists. You are now in the final Pashasana pose, and you should inhale and exhale at least five times, find yourself, and feel the active stretch in your torso, arms, and legs. Make sure you don't lose your balance as your hands connect. To increase the tension, you can also turn your head and look toward the ceiling. This will create additional tension in your neck. Practice the loop or Pashasana step by step Because this is an advanced exercise, you should practice it step by step. The goal isn't to force yourself to the point of painfully spraining yourself or pulling a nerve. If the full loop doesn't work right away, you can also work your way up to the final pose by gradually working through several partial exercises. Pashasana is said to have a therapeutic effect on back pain. So, if you suffer from tension or localized pain in the back and neck area, it may be able to alleviate it. Painful tension in the shoulders may also be relieved. Furthermore, Pashasana may have positive effects on digestive problems, asthma, or menstrual cramps. This exercise could also provide short- to medium-term relief from bloating. Image © fizkes / 123rf.com