Yoga BLOG

Tiriang Mukhottanasana - Die Meisterpose für Erleuchtung suchende

Tiriang Mukhottanasana - The master pose for enlightenment seekers

by Nick on Jun 20 2020
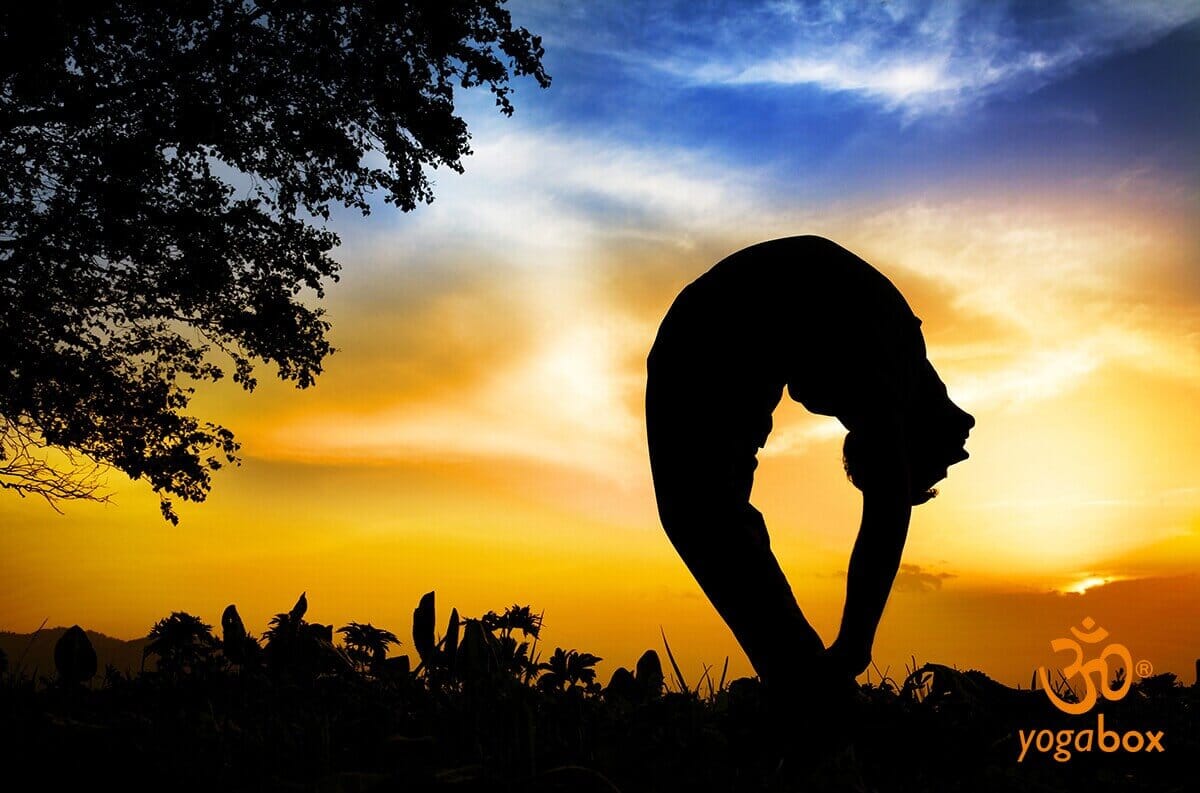
Tiriang Mukhottanasana is one of the asanas that all new yoga students look down on with envy, as they feel they are nowhere near capable of assuming such a pose. It's one of the most visually fascinating and demanding poses, challenging both student and master. The essence of this asana is to arch your back backward so that you form a circle to the back of your knees and can remain meditatively in this "P" pose. Sound fascinating? We'll tell you how to do this pose. Tiriang Mukhottanasana - The master pose for enlightenment seekers Open powerful chakras with the masterful Tiriang Mukhottanasana Roughly translated, Tiriang Mukhottanasana means something like "overhead facing intense stretching asana," and this simple name actually describes very well what the whole thing looks like in the end. Have you ever wished you had eyes on your back? With this pose, you'll achieve your goal. All jokes aside, Tiriang Mukhottanasana will earn you the utmost respect for the yogis who effortlessly get into and hold this position. What initially looks like a continuation of a headstand is a real challenge for balance and the back. Therefore, Tiriang Mukhottanasana is strongly discouraged if you have existing back injuries, disc problems, or have ever had a "lumbago." The "P" described above, which you form with your body at the end, activates the crown chakra , heart chakra , throat chakra, and brow chakra , often referred to as the third eye. These important chakras can fully open through this asana and sharpen your perception. The senses of hearing and touch are particularly stimulated. The sixth sense, which is meant to be opened by the ajna, can give you visions and higher perceptions. First, however, Tiriang Mukhottanasana is pure self-care. Only with a lot of practice, balance, and calm will you reach a state where you can perform Tiriang Mukhottanasana effortlessly. We recommend only practicing this asana when you are not under stress. How to take Tiriang Mukhottanasana Different schools employ different methods for performing Tiriang Mukhottanasana. As a beginner, you should only fully master this asana after many attempts and after holding a few back-strengthening poses. Since there's a risk of transitioning from the middle position into a headstand, a classmate or teacher can assist you at the beginning. Stand upright at the front of the mat , loosen your muscles, and slowly bend your back and neck backwards. Hold the semicircle briefly in the air, keeping your knees straight. Only when your body is horizontal in the air and your neck is stretched straight through the neck muscles do you place both hands at hip height and carefully begin to bend your knees. Bending too quickly can cause you to fall backwards. Move your hands up to your chest and then over your head towards the floor. Change your grip so that you can see your heels and your thumb is pointing upwards on your leg. Both hands simultaneously move up the back of your legs. Keep your gaze on your heels to relax the neck muscles . The grip is gradually reduced to just below your knees. Now hold Tiriang Mukhottanasana and lift your neck slightly to focus your gaze on the area behind you instead of the floor. Don't hold the pose for too long. If you experience severe pain, immediately release the pose upwards. Caution: Never simply lower yourself downwards, as this can cause injury to the neck area. Mastering the Tiriang Mukhottanasana This asana is a pose that will show you that you have complete control over your body and, therefore, your life. The asana is meditative for those who truly master it. You can set it as a goal you want to achieve as a yoga student. Image © byheaven / 123rf.com Link recommendation: Article on the topic of relieving tension
Wie Faszien mit Yoga zusammenhängen

How fascia is related to yoga

by Stefan on Jun 07 2020
Is fascia merely a fitness trend of recent years and a sales-promoting buzzword for black rollers? Or is there more to fascia, and can it be "trained" through yoga? In this guest post from Mindmonia , you'll learn what fascia is and what functions it performs in your body. Then, we'll discuss damaged fascia and how you can positively support it with yoga. Fascia - More than connective tissue Fascia runs through your body as a three-dimensional network. It connects and stabilizes it and protects your bones, organs, and tendons. The researchers of the Fascia Research Project at the University of Ulm, led by Dr. Robert Schleip, have discovered that fascia is actively involved in our movements. Healthy fascia tissue not only protects your bones and organs, but also optimizes your movement patterns. Adherent fascia and its consequences Fascia not only helps you with your movements, but also stores your movement sequences. In addition, incorrect strain or lack of movement directly affects your fascia. The elastic tissue hardens or sticks together. When the fascia becomes hardened, it thickens. For example, if you have tension in your neck, you'll feel hardened tissue. This includes the fascia. You can't actually feel adhered fascia. Since the fascia appears matted and stuck together under a microscope, it's called adhered fascia. Damage to fascia tissue manifests itself in various places, including: Blood and lymph flow slow down Power transmission is difficult Pain occurs in different places The concept of force transfer is a new discovery in research. Healthy fascia transfers force from your muscles to your bones without loss. If the fascia is hardened between your muscles and bones, the fascia transfers force there with losses. You'll notice this through more difficult movements, increased exertion during movement, and even restricted movement. By the way, with adherent fascia, there's a domino effect. Adhesions in the fascial tissue always lead to further adhesions. When fascial tissue is damaged, the motto is: act quickly. Yoga and positive posture If you've been practicing yoga for a while, you'll know its uplifting effect . However, if you're a beginner, yoga is all about: to sharpen body awareness to breathe consciously to find the center of the body In yoga, you perform your movements consciously. You work with your breathing and alternate between tension and relaxation. Many exercises address your balance and center your body. Because yoga stabilizes your core, you also improve your posture. Your body initially straightens up during the movement. Over time, this upright posture becomes your new posture. Since your movement patterns are stored in your fascia, you can use targeted exercises to counteract bad habits. Regular training will help you notice when you're sitting crookedly or your movements aren't smooth. Yoga and the deep muscles Fascia is controlled by your autonomic nervous system, meaning it operates automatically. Fascia always acts as an intermediary. It transmits force, for example, from the muscles to the bones. Fascia alone cannot move the bones. Unlike muscles, fascia cannot be specifically trained. Balanced movements and consistent loads help your fascia remain functional. However, one-sided training or insufficient movement hinders the fascia. Yoga is ideal as fascia training due to its deep effectiveness. The superficial fascia can be loosened through fascia rolling and massage. However, deep fascia tissue can only be positively influenced through targeted movements and muscle improvement. Yoga works with your deep muscles. It gives you less visible muscles, as it doesn't serve to build muscle. In short: Yoga doesn't make your muscles bigger, but it does make them more powerful. You gain a new body awareness and, as a result, feel your body better. This is where fascia training and yoga complement each other perfectly. The slower-paced forms of yoga, in particular, delve into the deep structures of your body and improve them. Experts like Paul Grilley (co-founder of Yin Yoga) and experienced yoga teacher Sonja Zernick-Förster cite Yin Yoga as the ideal fascia yoga. This calm and largely passive version of yoga focuses on relaxation. In Yin Yoga, you work your way deeper into stretches using your breathing. By holding a pose for several minutes, Yin Yoga works on your deep muscles. The slow stretching loosens your deep connective tissue. A rounded back is a classic feature of Yin Yoga. Yin Yoga provides a counterbalance for back problems and poor posture caused by desk work. Even vigorous versions of yoga, such as power yoga, improve your fascia. Every form of yoga is a holistic workout and therefore has a positive effect on your fascia. Stretches for a supple body Stretches also play an important role in yoga. They make your body more flexible. Basically, the following applies: Everyone stretches as far as they can without pain. With time and sufficient yoga practice, your body's overall flexibility will improve. For example, after a while, you'll feel like you can go deeper into stretches without resistance. You'll feel more flexible overall. Stretching in your body involves: muscles tendons Fascia With every stretching exercise in yoga, you automatically work on the functionality of your fascia tissue. Through conscious stretching, you activate your fascia. They must actively cooperate as you progress with the stretches. Yoga strengthens your muscles and loosens your fascia through intense stretching. Over time, your fascia gains elasticity, actively counteracting stiffness and adhesions. Fascia roller - a useful addition? Those suffering from damaged fascia can use a fascia roller in addition to yoga exercises. These rollers are designed to specifically "roll out" the fascia when you move your hands over them. When combined with yoga exercises for fascia, a fascia roller can enhance the effect on the fascia and provide a thorough stretch. Ultimately, a fascia roller is a logical addition to yoga training, provided it is used to stretch and heal the fascia. Yoga supports your consciousness For healthy fascia, you need an awareness of this invisible tissue that gives your body its shape. With yoga, you work on your body awareness and posture. Improved body awareness helps you identify and change bad habits in everyday life. Because to maintain your fascia tissue long-term and maintain its elasticity and functionality, you need to improve your habits. Only with mindfulness can you utilize this special kind of memory for your long-term benefit. After all, change always begins in your consciousness. Meditation, for example, is very helpful for this.
Finde Deine innere Mitte: 5 praktische Hilfsmittel beim Yoga

Find your inner center: 5 practical tools for yoga

by Stefan on Nov 22 2019
Originating in faraway India, yoga has made its way to the West in recent decades. This meditative practice has sparked a real hype, as more and more people swear by its diverse exercises that harmonize mind and body . Downward-facing dog, warrior pose, or dancer pose – yoga strengthens your back and is as good as any form of physical therapy . To ensure that your yoga exercises are truly gentle on your back and effective , and to help you build strength and balance , we'll share with you 5 practical yoga props that will support you in your next yoga session. A must-have for yogis and yoginis: The yoga mat What yoga accessories do you really need? The most important piece of equipment is the yoga mat . Although you could just as easily practice yoga on a rug or towel, the yoga mat offers many advantages . Not only does it allow you to perform all the exercises in a way that's gentle on your body, but its non-slip properties also help you maintain a secure footing. You can recognize a good yoga mat by the fact that it… …has a rough surface and is therefore non-slip … corresponds to your body size and therefore provides plenty of space for your head and feet during stretching exercises. … 4 – 5 mm thick … certified with the Oeko-Tex® Standard 100 quality mark and is therefore free from any harmful substances. Feel good: The right yoga clothing As with any sport, you should make sure you wear comfortable clothing for yoga that doesn't restrict your freedom of movement . It doesn't matter whether you prefer shorts or long pants, a thin long-sleeved shirt or a T-shirt. The important thing is that the clothes are neither too tight nor too loose . In addition to a perfect fit, your chosen clothing should be breathable . Synthetic materials make you sweat much more easily and quickly release unpleasant odors. Clothing made of natural materials , such as cotton, is much more suitable. You don't necessarily need shoes for yoga. You can easily perform all the exercises barefoot. However, if it gets too cold in winter, you can wear non-slip socks with small nubs on the bottom. Breathe deeply: the yoga cushion Breathing plays a central role in yoga. Calm and steady inhalation and exhalation has many positive effects . Focusing on breathing, known in yoga as meditation, is traditionally performed while sitting . To achieve the most relaxed and healthy posture possible, you will need a yoga cushion. When sitting still, the yoga cushion helps you fully concentrate on your breathing without being distracted by numb legs or back pain. The elevated sitting position prevents your muscles from cramping, relieves pressure on your spine, and creates more space in your abdominal area. This allows you to breathe in and out much more deeply . Meditation cushions come in various shapes , allowing for different sitting positions . It's important that you barely notice the cushion while you devote yourself entirely to meditation. For example, there are round cushions that allow for an upright and correct posture thanks to their rounded seat. Crescent cushions are ideal for sitting with your legs crossed. The classic zafu cushions have a particularly large and wide seat. Stretching and stretching: the yoga strap The yoga strap is one of the essential yoga tools for every yoga enthusiast . Available in a variety of lengths and widths, this strap improves both your flexibility and your posture. Beginners, in particular, often have difficulty practicing certain asanas correctly. The yoga strap helps you stretch your body without overstraining muscles and ligaments . Even if you can't reach your feet with your hands when standing with your legs straight at first, the yoga strap works true stretching miracles . The elastic band can be used not only for stretching your hamstrings ; it has a variety of applications . The yoga strap can also help you develop a straight posture, improve balance, and perform arm stretches more effectively. Seeing the world the other way around: the headstand stool Have you always wanted to do a headstand but have never been able to muster the courage to do it? With a headstand stool, you can easily change your perspective and view the world around you with your feet stretched upwards. When using the headstand stool, it's important to position it on a non-slip surface and, if possible , near a wall . Grasp the wooden frame with both hands, place your head in the designated cushion opening and your shoulders on the cushion, and then gradually raise your knees and legs toward the sky. By shifting your body weight onto your shoulders and arms, the stool helps relieve pressure on your cervical spine and head during the headstand . The headstand stool isn't just designed for headstands, however; it's also suitable for many other yoga exercises , such as forward and backward bends. Balance exercises are also much easier to perform with a headstand stool. An integrated balance bar helps maintain and improve balance. Thus, the headstand stool can do even more than its name suggests! Yoga has become an integral part of today's fitness landscape. The sport gets your body into top shape , and with a yoga mat and other equipment, it's even easier – have fun and, above all, relax during your next yoga session!
3 effektive Yoga-Übungen für Fortgeschrittene

3 effective yoga exercises for advanced practitioners

by Stefan on Oct 01 2019
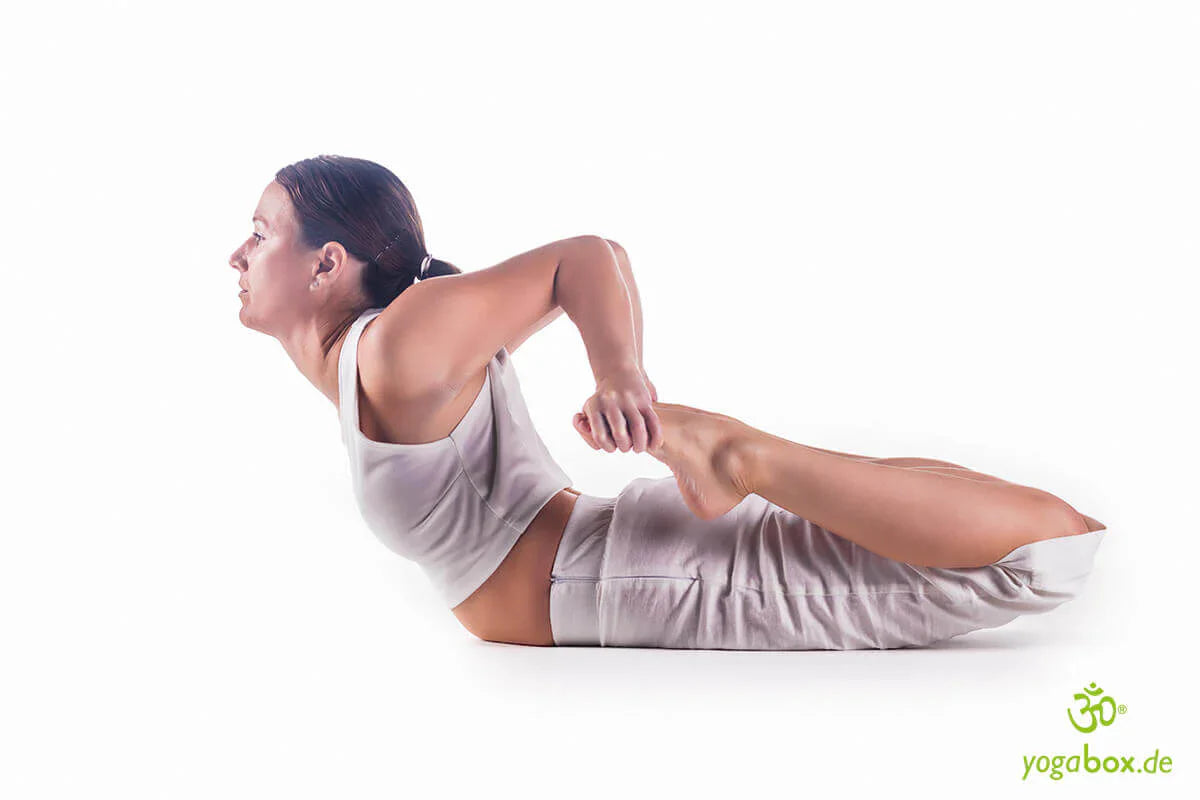
Photo by kike vega on Unsplash Hatha Yoga has a variety of positive effects Effect on your health: You become familiar with your body, work on the definition of your muscles and develop strength and power. Your balance and your flexibility will improve and your posture will become more upright. As an advanced learner, you are also already in the Able to hold strenuous positions for a long time. You have a strong Body tension and even breathing technique. Your coordination has improved Yoga exercises for beginners have improved and you have slowly become more flexible. Yoga student who fundamentally asanas Once you have mastered the technique, it makes sense to gradually integrate more progressive exercises, to challenge your body and mind. In this article I will introduce you to three classic ones like crisp yoga exercises for advanced practitioners. Who is it suitable for? More and more people are discovering yoga as a holistic A counterbalance to the stressful working life, where they enter another world and leave all everyday burdens behind. Good to know: Hatha Yoga is part of a complex phased plan, which consists of a total of eight consists of: mental self-control, cultivation, posture, Control of breathing, attention, concentration, meditation and Contemplation. Therefore, the exercises are not suitable for beginners. If you have not practiced each stage sufficiently, you may find that feel overwhelmed, because they are not done one after the other, but in part simultaneously. Start with exercises for beginners to slowly familiarize yourself with the individual steps to approach. Kakasana – Crow The exercise Kakasana is also called the crow pose. It requires a high degree of balance, strength, and equilibrium. Squat and support your arms between your knees. Bend your arms to the sides outside, place your knee on it and lift your feet from the floor so that only your Hands touch the floor. The exercise looks difficult, but after a few attempts However, it is easy to perform. It strengthens wrists, arms, shoulders and back. In addition, the exercise strengthens the hip and abdominal muscles and makes they are more flexible and supple. With practice, you may become accustomed to your physical Limits will come, but you will learn how to deal with your fears can. After you have breathed in and out between five and ten times, Slowly leave the position by bringing your feet closer to the floor. Kapotasana – Pigeon Kapotasana - also called pigeon pose, stretches the hip and Back muscles, which relieves tension in the back area. From the quadruped position you can easily get into the pigeon position. Push your right knee forward and place it between arms. Then pull your left leg far back so that it from the knee to the foot on the floor and is located directly in front of the thigh of the left leg the sole of the right foot is located. your upper body and breathe in deeply. As you exhale, bend your Arms and upper body forward and touch the floor with your forehead. After you have stayed in this position for a few breaths, stretch your arms forward until you can feel the stretch in your upper body. Then return to the starting position, take the quadruped stance and change sides. Purna Dhanurasana – the full bow The posture of the drawn bow is a very intense Backbend in the prone position. This asana is called a bow because our body in this position symbolically like a bow being drawn. The starting position is the abdominal relaxation position with forehead on Floor. Bend both knees and grasp your Instep. Contract your pelvic floor and inhale and lift your head from the Floor. Press your shins against your hands so that your Lift your upper body and thighs a little more off the floor. Exhale. and pull your inner ankles together, stretching your legs even further upwards. Try to feel the spaciousness in your chest. Stay for a few breaths. To come out of the pose, exhale and bring your legs Slowly lower yourself to your buttocks and release the hand position. To balance, push yourself into the position of the child. Photo by pixabay.com Tip As always, even for advanced users: be patient and pay attention to be in harmony with yourself. Many Hatha Yoga exercises are very demanding, so listen to your body and perform all asanas slowly and controlled to prevent injuries. Recreate the exercises and into your program. Make sure that you do not overexert yourself and Increase the difficulty of the exercises step by step. You will see that The exercises are challenging throughout, but with a little practice you can This way you will be able to enjoy the Challenge. With the right yoga mat, you can fully immerse yourself in your exercises. Especially for these exercises, you should make sure you use a non-slip mat . This also creates a perfectly separate space for yourself – where you can fully develop and focus on the exercises. Have fun trying it out!
Yoga Mudrasana - Mit Körper und Geist mit allem verbunden

Yoga Mudrasana - Connected to everything with body and mind

by Stefan on Aug 25 2019
Yoga Mudrasana - Connected to everything with body and mind The yoga exercise Yoga Mudrasana is one of the most central in yoga. It symbolizes the complete connection of body and mind in a very special way. During this union of both elements, all things we no longer need are let go, in harmony with the entire cosmos. Afterwards, the mind is refreshed and ready to absorb entirely new energies and impressions. In this asana, therefore, not only the body learns to let go completely—but above all, the mind as well. Discover your inner self with Yoga Mudrasana A major misunderstanding of yoga is that this millennia-old teaching is a lifestyle or sporting activity that only serves to make you look particularly good and fit. But only those who feel good inside ultimately radiate this strength outwardly. However, many yoga practitioners in the Western hemisphere often forget that the asanas, some of which are physically demanding, are actually only intended to gradually and effectively calm the mind—so that the necessary strength for the courageous path to one's own inner sources of strength can be developed. It's not surprising, then, that meditation has been considered the highest level of yoga for millennia. Therefore, Yoga Mudrasana is the best possible asana for deep meditation to get closer to one's own subtle being. After all, the word 'mudra' in Sanskrit means something like 'the movement of the hand,' 'the gesture of the hand,' or 'the hand position.' Therefore, Yoga Mudrasana is also considered the 'Seal of Yoga' or 'Symbol of Yoga'. How exactly does Yoga Mudrasana work? With Yoga Mudrasana, you can mobilize your hips and spine very effectively. Furthermore, the deep forward bend achieved through Yoga Mudrasana is also one of the best anti-aging poses in yoga. Yoga Mudrasana not only increases flexibility but also connects physical energy with the subtle forces of the mind and the universe in a very special way. For thousands of years, yoga has been a physical way to connect with the all-encompassing powers of all beings. And with Yoga Mudrasana, body and mind are connected in such a way that the physical practice enormously strengthens the power of the mind. The instructions for Yoga Mudrasana and which yoga exercise is ideal afterward Sit in the center of your yoga mat . Those who have mastered the full lotus position should assume this position. However, the full lotus position is often a bit difficult for yoga beginners. And in later life, the lotus position is often no longer easy to perform due to age – even for those who have practiced yoga for years or even decades. Therefore, it is perfectly acceptable to assume a different sitting position for Yoga Mudrasana. Good alternatives with a similar effect are the half lotus position, the cross-legged seat, or the heel seat. Those with more yoga practice can also combine Utthita Parsvakonasana – the Side Angle Pose and the Revolved Side Angle Pose (Parivritta Parsvakonasana) – with Yoga Mudrana. To do this, simply press your back heel into the yoga mat and then position your left hand on the inside of your right foot. Ideally, your hand should now be directly under your left shoulder. Finally, simply stretch your right arm up toward the ceiling and pull it lengthwise over your head. Image © dimol / 123rf.com
Krounchasana - die Reiher Stellung

Krounchasana - the Heron Pose

by Stefan on Aug 16 2019
Krounchasana - the Heron Pose The word Krounchasana comes from Sanskrit and is the name of the asana "Heron." Krouncha means "heron" and "asana" means seat. This yoga pose got its name from the resemblance of the vertically raised leg to the outstretched neck and head of this long-beaked and graceful wading bird. Getting into Krounchasana posture step by step To perform Heron Pose, first sit comfortably on your yoga mat in Staff Pose. In Staff Pose, extend both legs forward and bring them together. Bend your feet so that your toes point toward your face. Place your palms on either side of your hips, pointing your fingertips forward. Keep your spine straight and roll your shoulders back slightly, away from your ears. Feel your sitting bones pressing firmly into the floor. Straighten your spine again and begin to bend your left knee. Place your left foot on the floor next to your left gluteus maximus. You shouldn't feel any pain in your knee joint during this movement, so be especially careful when bending your knee. In the next step, bend your right knee towards your chest and grasp your right foot with both hands. Gently push your heel upwards. Then follows the movement that brings you into the heron pose. Extend your leg as far as you can. The goal of the Krounchasana pose is to fully extend your leg with a completely straight spine and continue to hold your foot with both hands. Then pull your shoulders down and back again and lift your chest. Lean back slightly and take at least three deep breaths in this position. Then release from the yoga pose by first carefully bending your right leg and slowly extending it back on the floor in front of you. Only then should you bring your left leg back into the staff pose. Repeat the heron pose on the other side. What you should pay attention to when performing the Krounchasana pose Krounchasana is not recommended for you if you have problems with your knees or ankles. Many beginners make the mistake of rounding their spine in Heron Pose. However, in Krounchasana, your back should be kept completely straight. To achieve this, you can bend your leg slightly instead of extending it straight. If your legs aren't stretched enough, you can also grasp them at the ankle or along the shin instead of bringing your hands together above the soles of your feet. There's also nothing wrong with using a strap or a cloth to slowly straighten your leg. To do this, wrap the band around the ball of your raised foot. Hold the band with each hand on either side. This way, you can slowly stretch it while moving your shoulders back and down. If you are already an experienced Krounchasana practitioner and would like to deepen the exercise, then move your chin towards your raised knee as far as is comfortable for you. The effect of Krounchasana The Heron Pose improves your posture and strengthens the muscles in your hips and core. In Krounchasana, you open your back legs, stretching your Achilles tendon, quadriceps, and calves. At the same time, the Krounchasana pose builds your abdominal muscles. Heron Pose is also said to have a regulating effect on blood pressure and circulation. Image © fizkes / 123rf.com
Der Yoga Frosch - Bhekasana (auch Mandukasana)

The Yoga Frog - Bhekasana (also Mandukasana)

by Nick on Jul 27 2019
The Yoga Frog - Bhekasana (also Mandukasana) There are two different names for the yoga frog pose: Mandukasana, which usually refers to the kneeling version, and Bhekasana, the lying version. The frog pose is an ideal exercise for opening the lower body, specifically the groin and hips. It also provides a strong stretch to the lower back. Below, you'll learn everything you need to know about the yoga frog pose, how to perform the exercise, what to keep in mind, and what benefits you can reap. How is Bhekasana, the Yoga Frog, performed? First of all, you should find a quiet place that is free from noise or other distractions. To do the exercise, you will need a comfortable mat , two blankets and a yoga bolster . Fold one blanket crosswise, place it on the mat and roll up the other blanket. Place this on top of the folded blanket. Lie face down on the mat. Take your time with this position. Then support yourself on your forearms and breathe in and out calmly and consciously. The distance between your knees should be no more than hip-width apart. Bend your left knee and place your left hand on your left foot. Your elbow should point outwards and be close to your rib cage. Lift your chest and hold this position for three to five deep breaths. Make sure that your breath flows smoothly during the exercise. The exercise opens the hips and groin and has many other benefits. What are the effects of Bhekasana? The yoga frog pose can improve the flexibility of the knees, hips, and feet, making them more mobile and strengthening the knee ligaments, making them more elastic. It can also reduce knee pain. The pose can also strengthen the ankles and relieve heel pain. It also stretches the thigh and buttock muscles, and strengthens the abdomen, lower abdomen, and pelvic floor muscles. Fat from the thighs, abdomen, and hips can be reduced. This yoga exercise also stimulates the stomach and spleen meridians, improving deeper breathing and posture. Positive effects on digestive and menstrual problems have also been reported. The pose can contribute to the harmonizing of emotional and impulsive moods, making Bhekasana a good place for relaxation and stress reduction. The yoga frog pose is even said to help with mild depression. What should you keep in mind when doing Bhekasana? When doing the yoga frog, it's important to pay attention to your breathing, especially when going in and out of the exercise. This has various positive effects, such as a greater reduction in belly fat . In addition to correct breathing and optimal posture, it's recommended to do the exercise on an empty stomach. If you have existing lower back problems or injuries to your hips, shoulders, knees, or stomach, it's important to be careful with the pose. In these cases, it's advisable to consult a doctor whether the yoga frog is advisable or not. The same applies if you have high or low blood pressure or migraines. Conclusion That's everything you need to know about Bhekasana. Viewed from above, the pose resembles a frog lying on its stomach. This gives the yoga pose its name. The focus is on mobility, flexibility, strength, and breathing. The body parts involved are the legs, shoulders, chest, and back. The frog pose is a simple yoga pose that's also suitable for beginners because it's easy to perform. Placing a pillow under your rib cage makes the pose easier. Image © ivanvess / 123rf.com
Triang Mukhaikapada Paschimottanasana - Mehr Energie für dein Leben

Triang Mukhaikapada Paschimottanasana - More energy for your life

by Nick on Jun 30 2019
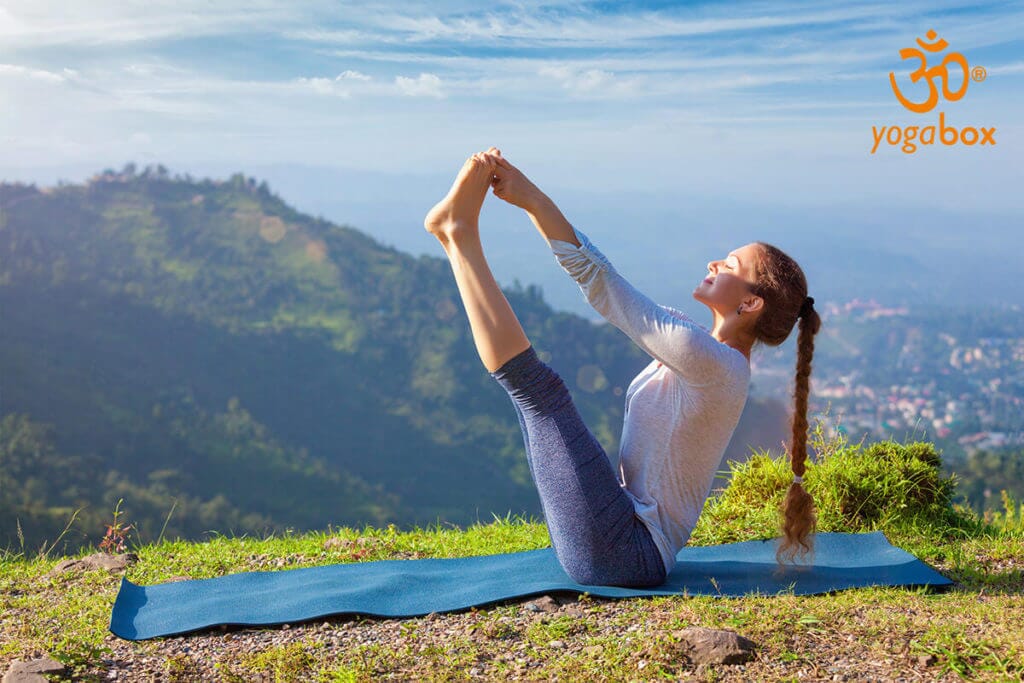
Through the Triang Mukhaikapada Paschimottanasana position, you can activate your navel chakra, the Manipura , and thus gain new strength. However, this classic Ashtara Yoga pose is not for beginners and demands a lot from your body. Mastering Triang Mukhaikapada Paschimottanasana correctly means keeping your muscles and tendons under control so that, with sufficient stretching, pain reflexes are not triggered. We'll tell you what to watch out for in this pose. Triang Mukhaikapada Paschimottanasana - More energy for your life What is Triang Mukhaikapada Paschimottanasana? The origin of the name Triang Mukhaikapada Paschimottanasana, like all Ashtara poses, lies in the way it is performed. Triang: three parts, Mukhaikapada: facing one leg, Paschim: facing west or with the back up, Ottana: stretched, Asana: pose. From this name, it's easy to deduce what the pose looks like in the final stages. With one leg bent and the other straight, grasp the front foot and bend toward the floor. For advanced yoga students, this sitting position sounds easier than it actually is; for beginners, the resistance begins at the latest when you bend toward the foot. In Triang Mukhaikapada Paschimottanasana, the focus of the movement is on the abdominal region. It primarily engages strong abdominal muscles with as little belly fat as possible to reduce resistance. At the same time, the thighs are heavily loaded and the Achilles tendon is stretched. Triang Mukhaikapada Paschimottanasana is not a pose you should start a workout routine or session with. Without warming up and practicing easier asanas, this pose is almost impossible and will overstrain your tendons. Therefore, as with many challenging yoga poses, it's important to check yourself to see how strong your body's resistance is and whether the initial pain from the stretch subsides. If it doesn't, you shouldn't hold this pose. How to get into Triang Mukhaikapada Paschimottanasana There are different ways to perform Triang Mukhaikapada Paschimottanasana. The most comfortable way to prepare your body for the movement is as follows. First, kneel on the yoga mat and sit back into a sitting position, clasping both knees in front of your chest with your arms. Now, with the help of one hand, gently pull your right leg back. Grasping the shin muscle will keep the leg straight and prevent it from becoming awkwardly bent. The leg should rest beneath you so that your thighs form a flat surface, as if you were still sitting. Now move this leg slightly to the side until your bottom is sitting on the floor. While sitting, stretch out the other leg forward. Make sure that you do this slowly, otherwise it will be difficult to maintain your balance. Do not let the left leg tip to the side; the foot must be straight at the end and should only be resting on the heel. Wiggle your toes slightly to keep the foot in action. If the leg falls asleep in this pose, it will be uncomfortable for the thigh muscles . Check whether you are still sitting on the floor or whether your right leg has wandered back towards your body. Only when both legs are in the correct position do you lean straight forward as usual, so that your back is slightly bent rather than hunched. Depending on your range of motion, you can lie completely on your left leg and hold the foot, or stretch as far as possible. At the end of the asana, release it backward rather than forward, until you are sitting on both lower legs or the soles of your feet. Benefits of Triang Mukhaikapada Paschimottanasana Triang Mukhaikapada Paschimottanasana directly targets the navel chakra. With regular practice, this asana can give you the perfect energy boost for your day. Image © dimol / 123rf.com
Adaptogene und ihre Wirkung

Adaptogens and their effects

by Nick on Jun 25 2019
Interview with superfood expert Sandro Russo Adaptogens are the new buzzword in the beauty and superfood industry. After Gwyneth Paltrow turned these special natural products into a trend, they're taking juice bars, beauty stores, and lifestyle magazines by storm. But what are adaptogens? Sandro Russo, superfood expert and founder of Terra Elements, answers all your questions about adaptogenic natural products. Adaptogens and their effects What are adaptogens? Sandro Russo : "Natural products said to have adaptogenic properties are able to help the body adapt to everyday life. The term was defined in the 1950s and derives from the English word 'to adapt'. By consuming adaptogenic natural products, our bodies can more easily find their natural balance: In stressful phases, they support us in relaxation; in lethargic moments, they have a motivating effect. Which natural products have an adaptogenic effect? Sandro Russo : "The spectrum is so broad that it is almost impossible to compile a definitive list of adaptogens. The classics of TCM (traditional Chinese medicine) and Ayurveda include: Astragalus , also known as star milk, is used in TCM for anti-aging purposes. Its root is primarily used, as it is believed to balance our life energy, Qi. A variety of secondary plant substances contribute to its adaptogenic effect. Download bio-astragalus Ashwagandha , or winter cherry, is the Ayurvedic answer to ginseng. It is valued by stressed people. As its nickname, "winter cherry," suggests, the herbaceous plant is also recommended for restless sleep. Download organic ashwagandha Reishi , the glossy polypore, is one of the most important medicinal mushrooms in Traditional Chinese Medicine (TCM). In natural history, it is considered the 'mushroom of longevity' and is revered as a symbol of eternal life. Thanks to its valuable ingredients, it is said to have a balancing effect on stress levels. Download bio-reishi Maca , the superfood of the Incas, is characterized in the Peruvian Andes by its exceptional resistance to external environmental influences. The root has a long tradition among indigenous peoples not only as a food but also as an adaptogen. Download bio-maca How do we use adaptogens? Sandro Russo : "Most adaptogenic natural products cannot be consumed in their natural form—either due to their consistency, their composition, or their growth in hard-to-reach areas. Therefore, they are usually taken as powders. In finely ground form, the mushrooms, herbs, and roots can be easily integrated into daily life in a variety of ways. Medicinal mushrooms like reishi are traditionally prepared as tea. Ashwagandha is often brewed in Ayurveda as a warming milk drink. Maca is a popular ingredient in smoothies and chia puddings. If you're not up for kitchen experiments, you can also stir the powder into a glass of water. And on the road? Sandro Russo : "Capsules are particularly convenient for on-the-go use. However, caution is advised when purchasing: The capsule should be 100% filled with the natural product and free of any filler additives such as maltodextrin. To avoid being duped by mixed products with low doses of adaptogens, it's definitely worth taking a close look at the ingredient list." What else should we look for when buying adaptogens? Sandro Russo : "To ensure that the product contains all the constituents of the plant, root, or fungus, all raw food quality criteria should be met. This means: no contact with temperatures above 42 degrees Celsius. Furthermore, I would only use products from certified organic farming. And as already mentioned: stay away from products with additives, fillers, or excipients. Adaptogens have absolutely no need for these." About Terra Elements With over 100 superfoods, Terra Elements is Germany's specialist for effective natural products. The goal is not only to make these often hard-to-find herbs, roots, fruits, and other ingredients available in the highest, purest quality, but also to make them accessible from a variety of perspectives – since 2014 in its own online shop and since November 2017 in Germany's first superfood store in Munich. In addition to over 100 superfoods, the Terra Elements online shop's product range includes natural dietary supplements, 100% vegan natural cosmetics, and raw food products. Furthermore, as an organic-certified company, Terra Elements places great emphasis on the organic quality of its products and an ecologically sustainable lifestyle and working practices. Images © Terra Elements
Ubhaya Padangusthasana: Anmut bis in die großen Zehen

Ubhaya Padangusthasana: Grace to the big toes

by Nick on Jun 06 2019
Could any pose be more graceful than Ubhaya Padangusthasana? In a suspended position, the yogi holds only the bound toes of his outstretched legs and elegantly balances his body. Externally and internally, the pose is a balance that emphasizes equilibrium and harmony. Discovering and maintaining balance is something we need not only in yoga practice, but also in our daily lives, both at home and at work. Here you can learn more about this beautiful asana, which even beginners can attempt with some relaxation. Why not give it a try? Ubhaya Padangusthasana Grace to the big toes Sanskrit name gives us valuable clues In yoga, asanas often have names that describe what a pose looks like. This is also the case with this asana. "Ubhaya" means "both," "pada" is the "foot," "angustha" means "toe" or "finger," and "asana," as you probably already know, is the word for "exercise" or "pose" in yoga. Ubhaya Padangusthasana is the pose in which the feet on the same side are bound with the fingers. In English, this asana is also called "Double Big Toe Pose." Requirements for the Asana As you can easily see, balance is a key prerequisite for Ubhaya Padangusthasana. You can also achieve balance for this pose by simply grounding yourself on your buttocks and squatting your legs. Don't tie your toes, but simply place your hands loosely on your lower legs. As you roll back to your mat in this position to regain balance, gently massage your back. You can also try rolling with your toes tied but your legs bent. For Ubhaya Padangusthasana, you also need abdominal strength, which you can continually develop through various exercises. Flexibility in the back and inner thighs is important for extending your legs. Gentle stretching exercises are recommended here. Triangle Pose is particularly well-suited for this. Trying Ubhaya Padangusthasana for the first time Sit on your mat. Stretch yourself upright so that the crown of your head can reach its highest. At the same time, ground yourself. Now bend your legs so that your knees are bent. Grab your big toes. Gently lift your feet off the floor. Important: Make sure your core is stable. Engage your stomach and lower back, and keep your hips stable. Once you've found your balance, slowly extend your legs so that you're floating in the air with straight legs. Continue breathing evenly. If you haven't yet reached the necessary stretch, that's okay. This pose is also beneficial if your legs are still slightly bent. Discover the benefits of Ubhaya Padangusthasana The strength from your core makes the pose possible. You'll already feel the strengthening of your core muscles, your stomach and back, when you first assume the asana. This strengthening stabilizes the spine and can improve posture. The often shortened muscles of the back of the thighs are sustainably stretched. The shoulders and upper back also receive a gentle stretch. Ubhaya Padangusthasana is well-suited to activating the energies in your body and awakening you. Therefore, this pose is also a great way to start an energetic day. The Muladhara and Svadisthana chakras are stimulated by this exercise. The balance this asana provides will accompany you throughout the day and fill you with self-confidence. Incidentally, Ubhaya Padangusthasana is also a great pose for meditation for advanced practitioners. After stretching, countermovement in the form of a gently rounded spine is often a nice way to balance things out. To do this, lie on your back and simply bring your knees to your chest and gently rock back and forth. Image © dimol / 123rf.com
Sama Vritti Pranayama: gleichmäßig und ganzheitlich atmen

Sama Vritti Pranayama: breathing evenly and holistically

by Nick on May 27 2019
It's often said that pranayama, or breathing exercises , have a more powerful effect on us than physical asanas. Whether this is true is hard to prove, and it probably varies slightly from person to person. But pranayama ensures that life energy is distributed particularly well throughout your body, and this strengthens you for each day. Pranayama exercises, like asanas, relaxation, and meditation, are part of classical yoga practice. One pranayama exercise that even beginners can master is Sama Vritti Pranayama. Here you'll learn what this melodious breathing technique entails, how to perform it, and what effects you can achieve with it. Sama Vritti Pranayama breathing evenly and holistically Even breathing for more balance in life We always feel most comfortable when we are balanced. Sama Vritti Pranayama is particularly suitable for this, as inhalation and exhalation are consciously held for the same length of time. For example, you can count to 4 as you inhale and exhale. Unlike Sama Vritti Pranayama, Vishama Vritti Pranayama is a breathing technique in which inhalation and exhalation are of unequal length. Sama Vritti Pranayama is the basis for the Vishama variation and, as even and conscious breathing, is also used for the performance of many asanas. Create a pleasant atmosphere There is often no time for conscious breathing in everyday life. Sama Vritti Pranayama gives you the opportunity to devote yourself to Prana in detail. If you practice at home, you need a quiet atmosphere in which you can truly relax. Undisturbedness is particularly important in this context. Smartphones and the doorbell should be turned off, and family and friends should simply not disturb you during this time. However, once you have become more experienced, you can also incorporate Sama Vritti Pranayama into your everyday life. For Sama Vritti Pranayama it is best to choose a sitting position in which you can relax and, above all, sit upright. This can be cross-legged on the mat or sitting on a chair. Discover balance in your own breathing It takes a bit of practice to make your inhalation and exhalation evenly long. That's why internal counting is often the right technique to sensitize you to a regular breathing rhythm. You should also take the time to discover how long you should inhale and exhale for yourself so that you feel comfortable doing so. Every person is different and has their own breathing rhythm. Therefore, a good place to start is to observe your breath for a while and notice how unique it is for you. In this process, you really only observe your breath but do not judge it. You may also notice that inhalation and exhalation do not follow one another directly. There is a short, completely natural pause after both inhalation and exhalation. You should also incorporate this into Sama Vritti Pranayama. Experience the effects on mind, soul and body Of course, the mental and emotional effects of regular breathing are particularly prominent. It can help you reduce anxiety and restlessness. This applies to both long-standing restlessness and work-related stress that you want to breathe away. Sama Vritt Pranayama is also suitable if you want to unwind after a stressful day at work and sleep peacefully later. You can also benefit physically from pranayama in the Sama Vritti version. Even breathing helps you relax muscle tension. Considering that muscular tension can often trigger headaches and back pain, you'll probably guess that Sama Vritti pranayama can prevent and perhaps even alleviate these. Concentrating on breathing is a kind of inner contemplation, a journey to yourself. Therefore, Sama Vritti Pranayama is also a good preparation if you want to devote yourself to meditation. Image © iakovenko / 123rf.com
Styana: das Yoga-Hindernis des Stumpfsinns

Styana: the yoga obstacle of dullness

by Nick on May 24 2019
Yoga is much more than performing asanas in correct form and experiencing beneficial effects on body, mind, and soul. Yoga is also a spiritual guide to enlightenment. You probably know that enlightenment is difficult and certainly not attainable by everyone. But perhaps it's new to you that the obstacles to it have already been compiled in a kind of catalog. This was done by none other than Swami Sivananda . The Indian guru recognized early on and compiled in his texts the obstacles that can stand in the way of the yogi (as well as anyone else in life). Here you can learn more about the second obstacle, styana. Styana: the yoga obstacle of dullness Dullness as inertia of the mind Dullness is something that can be very inhibiting. In this context, Styana refers to sluggish thinking and behavior, which can be characterized by stubbornness. This can manifest itself, for example, in rigid behavior that is repeated over and over again, in a "dull" way. Often, the cause is a lack of energy or mental flexibility. When others are affected by this dullness and the behavior remains unchanged, empathy for others is often also lacking. Changing compulsive behavior patterns Examples of styana can be found in almost every yoga class. Imagine you're trying out a new yoga style or joining a new class. You might be driven to perform certain asanas as perfectly as possible (or perhaps even better than the yogi on the mat next to you). This often doesn't work out, perhaps because you have a physical limitation or are simply not trained enough. Your yoga teacher might recommend an option, but you don't want to admit that it's probably exactly right for you at that moment. So you continue practicing without an option, unconcerned about your limits, and you might even experience pain in the asana. This is mindlessness, and you can easily see that it has nothing to do with enlightenment; on the contrary: It can even harm you. Acceptance is important Overcoming Styana requires acceptance, which is sometimes not easy for us. Reinhold Niebuhr's Serenity Prayer is an example of how working on dullness is likely something that transcends cultures and is generally beneficial to humanity: "God, grant me the serenity to accept the things I cannot change, the courage to change the things I can, and the wisdom to know the difference." This acceptance is groundbreaking for all who wish to overcome Styana. Change and adapt Swami Sivananda doesn't advocate simply forgetting things we can't achieve. The best example of this is the option that can be offered in yoga for virtually every asana. So, for example, if you can't perform an asana correctly, use some relief. Bent legs instead of straight ones. A raised seat. The use of straps or blocks , as is so often practiced in Iyengar Yoga . Change your behavior, adjust your habits. You will notice that this has a positive effect not only on you but also on others. Recognize dissatisfaction as the cause We often tend to take out our own dissatisfaction on others. But it's not the yoga teacher's fault if we injure ourselves in an asana that's far too difficult for us. Nor is it the person on the mat who spoke to us who's talking to us. It's our own responsibility, and the responsibility for ourselves that we all carry within us. When we blame others for things our styana has caused, we not only damage ourselves but also our relationships with others. Reason enough to stop doing that. Image © racorn / 123rf.com
Eka Pada Bakasana I: einbeinige Krähe für Dein Gleichgewicht

Eka Pada Bakasana I: one-legged crow pose for your balance

by Nick on May 18 2019
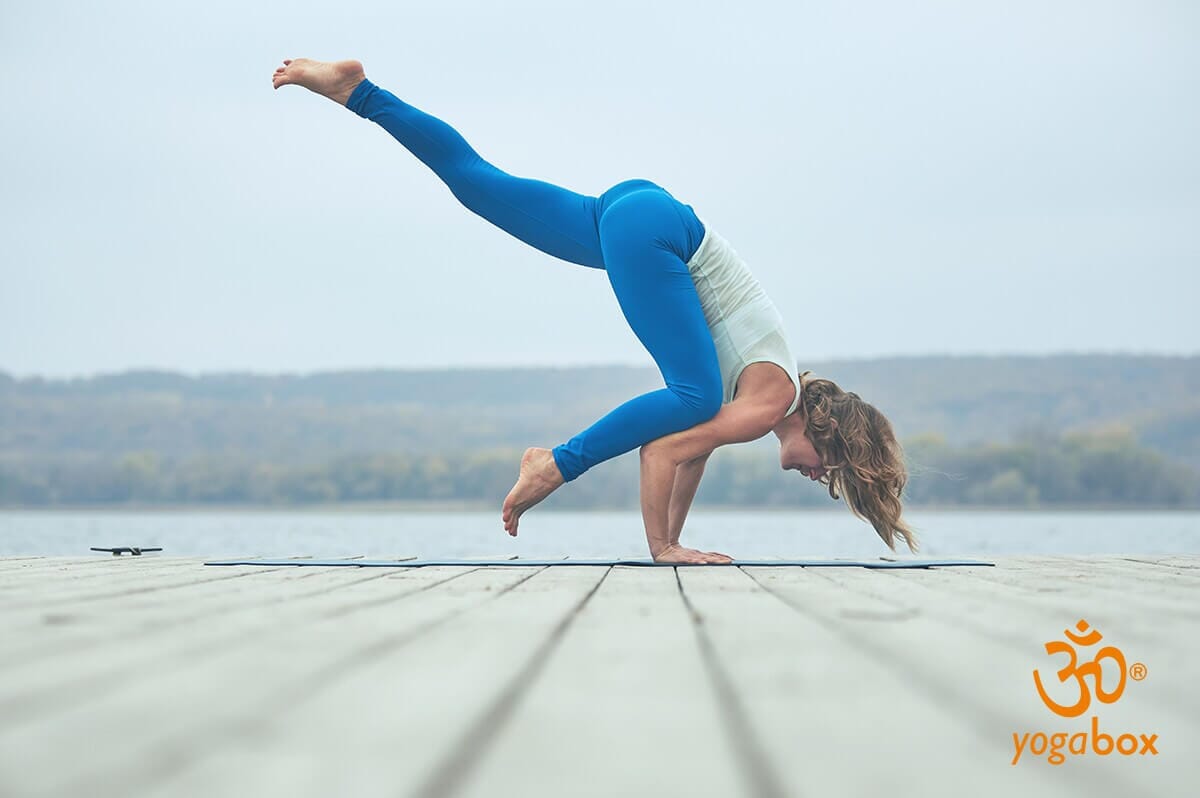
In yoga, we often experience that external and internal balance are in harmonious harmony. A good example of this is Eka Pada Bakasana 1. The one-legged crow pose is both a balance exercise and an asana for inner balance. Unlike the classic crow pose, where both legs are tucked in the air, the one-legged crow pose stretches one leg backward and upward: a graceful pose that captivates the observer and requires a great deal of concentration from the practitioner. At first glance, Eka Pada Bakasana seems like an almost impossible exercise. But (as is so often the case in yoga), balance depends on our inner balance, which can make many things possible. Eka Pada Bakasana I One-legged crow pose for your balance How to best prepare for the one-legged crow pose Preparation is key. The arm and finger strength you need for Eka Pada Bakasana can be gained from many yoga poses. This starts with the dog , a classic in every yoga practice. You should also do abdominal exercises to support this, as your core needs to be working hard to extend your leg backward. You can first practice your balance for Eka Pada Bakasana by practicing the classic crow pose, meaning both legs are bent. In this position, you'll already gain the confidence to float grounded on your hands without falling forward. For the first time in Eka Pada Bakasana You start in the classic way, just like in the crow pose. Squat down and ground your hands firmly by fanning your fingers out wide. Place your hands shoulder-width apart, with your elbows bent. Put more weight on your hands by lifting your hips and moving your upper body forward. Place your knees against your upper arms and press them together to create a small hinge, which you will need to lift yourself into the crow pose. Trustfully lift your feet off the floor and feel your hands, arms, and shoulders supporting you. Hold this position for a moment and consciously tense your stomach. Now stretch one leg back and up. It doesn't matter which leg you use. As always in yoga, practice Eka Pada Bakasana afterwards in the opposite direction. What is important in this asana? Press your upper arms together tightly to give you the stability you need in the air. Engaging your core is also very important for holding the classic crow pose and then extending one leg. It's also important to be able to confidently shift your upper body forward. If you're worried about falling forward, add padding to the front of your mat. You can also enlist the support of another yogi to gently support you in the pose until you have the confidence to do Eka Pada Bakasana on your own. Alternatively, you can practice the one-legged crow pose facing a wall. Experience the effects of the one-legged crow Eka Pada Bakasana offers a whole range of truly beneficial effects that you can utilize with a little practice. First of all, this asana naturally strengthens you. You can enjoy this in your hands, arms, shoulders, and of course, your stomach and back. This activation gives you energy that you will certainly need throughout the day, which is why the one-legged crow pose can be a really great asana to practice in the morning. It improves your balance in the long term. This doesn't just mean external balance. Internal and external posture are often connected (not only in yoga). Thus, Eka Pada Bakasana also gives you inner balance and therefore more self-confidence . Important: Don't forget to keep breathing while you exert yourself. Crows don't hold their breath, so don't you either! Image © sandsua / 123rf.com
Sadhana oder auch Abhyasa: Ein individueller Weg zu Freiheit und Glück?

Sadhana or Abhyasa: An individual path to freedom and happiness?

by Nick on May 07 2019
Sadhana and Abhyasa are two words and principles that can be used synonymously. The goal of sadhana is to free life from its inherent limitations. It is a conscious and systematic spiritual movement that guides the mind through the various stages of consciousness and brings you closer to spiritual unity. Sadhana or Abhyasa An individual path to freedom and happiness Mindfulness and systematic mental movement Abhyasa is more than just a simple principle of thought or a fixed thought pattern; it is the consistent and sustained engagement with one's own thoughts and consciousness in order to leave negative tendencies such as lust, anger, greed, selfishness, and egotism behind. Self-discipline plays an enormously important role in this. The negative aspects of your being must be disciplined and tamed so that you no longer have to accept them as part of yourself. It's a difficult path, but one that anyone can master through consistent application and practice. It only takes time, discipline , and inner peace to master the thorny path. A lifelong process: Abhyasa as a life principle Sadhana or Abhyasa is a lifelong process that you must pursue consistently in order to achieve the success you desire in life. It is a difficult and thorny path that many aspirants remain eluded by. Often simply because of a lack of success, which can be frustrating, especially at the beginning. With Sadhana you should not expect quick successes; rather, they develop slowly and steadily. Reaching new levels of consciousness is a long-term process within you. Give yourself and your mind the necessary time and practice your Abhyasa consistently and with full awareness . Only in this way will you reach the points on your path where you experience deep, everlasting and lasting joy and unshakable peace within yourself. The spiritual path in Sadhana - step by step Spiritual progress in sadhana is a continuous process that can only be achieved through consistent, lifelong sadhana. There are no shortcuts and no complete guide. You must be disciplined and strict with yourself to make abhyasa the center of your mind and to constantly work on yourself and your spiritual progress. You can imagine spiritual sadhana like a spiral or a snail shell. In the beginning, each step requires tremendous effort, concentration, and strength. But with time and progress, abhyasa becomes easier and easier, and the spiritual strength growing within you guides you further. You gradually approach the center of the spiral. If you stay on this path, you will continue to improve. Spiritual progress and abhyasa are not a sprint, but a long marathon that gradually fills you with a sense of inner peace . Recognizing and appreciating progress in Abhyasa It is difficult for many aspirants to practice sadhana and achieve spiritual progress. This is both a goal and an obstacle on the path to fulfillment. Progress in abhyasa can really only be measured by greater serenity, calm, and one's own peacefulness. But appreciating and rejoicing in this success already leads away from this point of fulfillment. Your success in abhyasa is reflected in a healthy body and mind, in the calm and balanced nature of your emotions, and in the serenity of your being. These points are viewed with the utmost respect and awe, especially at the beginning of sadhana. However, once you reach these points yourself, they become indifferent to you, as they no longer have any significance. You rest within yourself and feel the nearness and presence of God everywhere. Image © fotomaximum / 123rf.com