Yoga BLOG

Yoga Dandasana - die anspruchsvolle Stockhaltung

Yoga Dandasana - the challenging stick pose

by Nick on Apr 27 2019
There are asanas that look simple, but are actually much more challenging than you might think. Yoga Dandasana is one of them. The cane pose is one of the sitting postures that serves as the starting point for many asanas. They allow you to relax, have a powerful effect, and offer many other benefits. Below, you'll learn how Yoga Dandasana works, what you can achieve with it, and what you should pay attention to when performing it. Yoga Dandasana - the challenging stick pose Yoga Dandasana - Long Seat or Stick Pose Dandasana, the Cane Pose, is one of the symmetrical asanas. It is the starting position for all seated forward bends. You sit with your legs straight and raised upward. This strengthens the core muscles and stretches the back of your thighs. Essentially, the core muscles refer to all the muscles between the diaphragm and pelvis: the back, abdominal, hip, and pelvic floor muscles. Sitting in Cane Pose means that the entire body is maximally tensed. How is Yoga Dandasana performed? Wear comfortable clothing, sit upright, and stretch both legs forward. Keep your toes slightly splayed. Keep your legs tensed and your thighs pressed into the mat. If your lower back hurts, keep your legs slightly bent. Your pelvis will shift slightly forward. Place your hands behind your body and gently press into the yoga mat . If your pelvis wants to tilt forward, you can also sit on a yoga block or blanket . Tuck your toes toward your shins while pressing your heels into the floor. Straighten your head and spine and imagine that you are a marionette and that someone is gently pulling you upwards using a string attached to your head. While sitting, stretch out. Pull your shoulder blades slightly together and hang your arms loosely at your sides. You can also support yourself with your hands on the floor. Despite your body tension, keep your gaze relaxed. Yoga Dandasana variations for advanced practitioners Once you feel confident performing the pose and can hold it for a few minutes, you can try different variations: Stick pose with legs raised: The legs remain raised while the heels press into the floor. This variation is also suitable for people with lower back problems. Stick pose with raised arms: Stretch your hands up to the sides of your head and gently press the palms of your hands together. Keep your head straight and gaze forward. If you pay close attention to yourself, you'll quickly notice how your body senses change. What are the benefits of Yoga Dandasana? Dandasana is a soothing exercise that helps you find yourself, calm down, and ground yourself in the midst of stressful everyday life. The energies from the earth flow directly into the body. Physically, this asana allows you to stretch and extend the back of your legs and the entire spine, strengthen your core, and tone your gluteal muscles. Practicing this pose will make it easier for you to maintain optimal posture while walking and keep your back straight. Furthermore, the sitting position can stimulate and activate digestion. People who suffer from sciatica report that regularly sitting in Dandasana yoga pose reduces pain. It is also said to be able to cure kidney and abdominal pain. Summary Yoga Dandasana, the most important starting position for seated asanas, can have many mental and physical benefits. You can return to this position whenever you feel your body needs realignment. The exercise can also be performed beautifully outdoors, for example, on a meadow or at the beach. The connection to the earth always reinforces the feeling of inner peace, recharging your batteries, and improving your well-being. In addition, the cane pose has a stretching and strengthening effect. Image © fizkes / 123rf.com
Nadi Shodhana Pranayama - eine der wichtigsten Atemübungen

Nadi Shodhana Pranayama - one of the most important breathing exercises

by Nick on Apr 23 2019
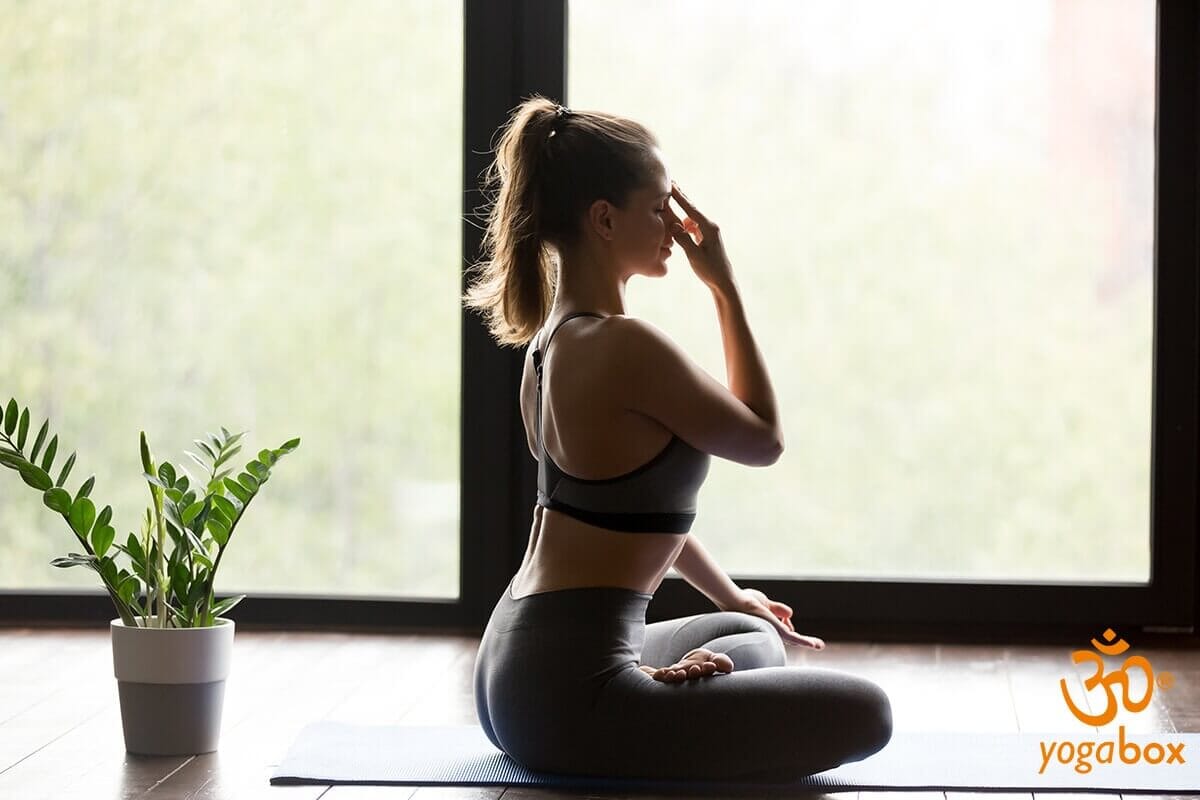
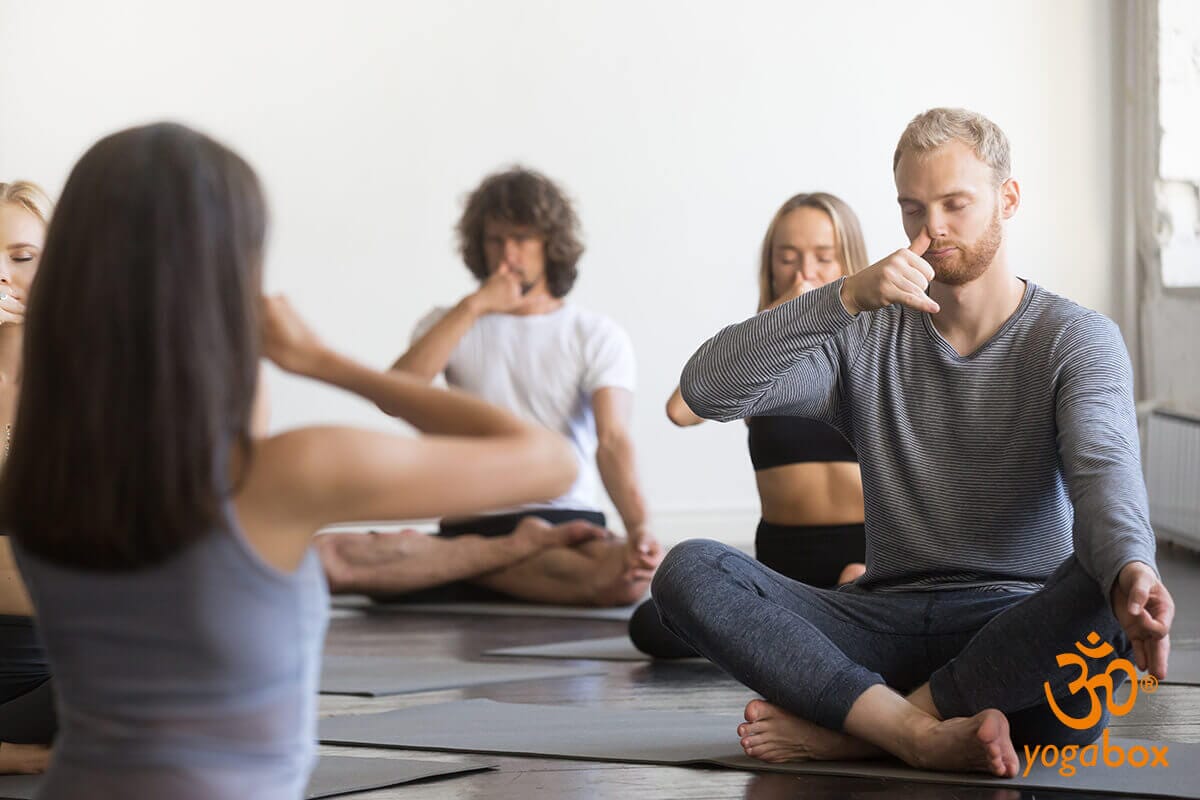
Nadi Shodana is one of the most important breathing exercises , suitable for beginners but also for professionals thanks to its highly advanced variations. The goal of the exercises is to renew energy in the shortest possible time. Nadi Shodhana Pranayama also has other benefits. Below, you'll learn what these are, how the exercise works, and what to keep in mind. Nadi Shodhana Pranayama - one of the most important breathing exercises Nadi Shodhana Pranayama - conscious alternate breathing Proper breathing can unleash great healing powers. This was recognized long ago, and practitioners of Nadi Shodhana Pranayama are said to benefit from it. Nadi Shodhana literally means "cleansing the nadis," the energy channels in the body, which should be free of blockages and tension. Only then can energy flow optimally. Nadi Shodhana cleanses the so-called network of nadis, which are tube-like conduits through which pranic energy circulates. By opening the nadis, pranic energy can flow throughout the entire body. How does Nadi Shodhana Pranayama work? The word nadi means tube, shodhana means purifying, and prana is the sum total of all energies. Ayama means expansion and extension, but also stopping and holding back. Nadi Shodhana Pranayama is a demanding but very effective nasal breathing technique that has a very relaxing effect. The nasal passages should be clear. Strictly speaking, it is alternate nostril breathing that works as follows: Sit comfortably in a chair without leaning back. You can also kneel or choose the lotus position. Make sure your back is straight and relaxed. Place your left hand on your thigh, palm facing up. The tips of your index finger and thumb should touch, and the remaining three fingers should be extended. Close your eyes and focus on your inner self. Then breathe in and out alternately through your left and right nostrils. While inhaling through one nostril, close the other nostril and count to five. Hold your breath. Then close both nostrils before inhaling and exhaling again. Count to five as you exhale. Repeat the alternate breathing a few times and then place your hands on your knees. Once you're experienced, you can practice this alternate nostril breathing for up to 30 minutes, or even less depending on your time. If you feel dizzy, stop immediately and gradually increase the pace from there. The counting times can also vary. Alternate nostril breathing is also often used before a meditative exercise because it calms the mind. It can be practiced almost anywhere and at any time, without any aids or special requirements. A quiet moment is enough for a few deep breaths. What are the benefits of Nadi Shodhana Pranayama? Alternate nostril breathing (Nadi Shodana) promotes inner balance, increased peace , serenity, joy, and harmony, as well as mental concentration . It is intended to create emotional balance and eliminate fears and insecurities. Nadi Shodhana Pranayama is also said to harmonize all bodily functions, prevent colds and allergies, and improve nasal breathing. The exercise is also a good cardiovascular workout. Lung capacity can also be optimized, thus having a positive effect on conditions such as asthma. Summary Alternate nostril breathing is called "Nadi Shodhana." This translates as a cleansing exercise, and this is precisely the focus of this healing breathing exercise. It's about allowing energies to flow, cleansing the energy body, and elevating the energy centers. Breathing should always be light and effortless, as it is, after all, a relaxation technique. Find your own rhythm and breathe in and out slowly and calmly. Assume your desired meditative sitting position and maintain an upright, comfortable posture. Nadi Shodhana unfolds its healing effects on physical, energetic, and mental levels. Image © fizkes / 123rf.com
Viloma Pranayama: Reinigung in der Wechselatmung

Viloma Pranayama: Cleansing through alternate breathing

by Nick on Apr 19 2019
Pranayama, or breathing exercises, are an essential part of yoga practice, alongside asanas, relaxation, and meditation. Viloma Pranayama, or alternate nostril breathing, is very well-known in this context and is often taught even in beginner's courses. Once you've learned it under the guidance of a yoga teacher, you can also practice it regularly at home. Here you'll learn exactly how Viloma Pranayama is performed, what to pay attention to during this practice, and what benefits this breathing exercise can offer you. Viloma Pranayama cleansing in alternate breathing Alternate breathing and its prerequisites In the context of breathing, alternation means alternating between the right and left nostrils for breathing. To do this, sit comfortably on your mat (or on a chair). If you're sitting on the mat, you can do this with your legs crossed, for example. Kneeling is also suitable for Viloma Pranayama. The main thing is that you can fully concentrate on the breathing technique . This is especially possible if you can relax and close your eyes during Pranayama. Breathe alternately on the right and left Alternating between the right and left nostrils is made possible by closing them with your fingers. Bring your right hand to your nose so that you can close the right nostril with your thumb and the left nostril with your ring finger. First, close the right nostril with your thumb and breathe in evenly through the left nostril. Count slowly to 4 in your head and make sure that you fill about 75 percent of your lungs with oxygen. Now close the left nostril as well and, holding your breath, count to 4 again. Then open the right nostril and breathe out for a count of 8. Empty yourself, which will prepare you for the next inhalation. Now everything happens in reverse. Inhale through the right nostril and exhale through the left. Regular practice You can practice alternate nostril breathing for three sets, or even up to eight. Experienced yogis can also practice alternate nostril breathing for half an hour. You can practice alternate nostril breathing every day. Learn about the effects of alternate breathing Viloma Pranayama can provide a multitude of beneficial effects for your well-being . These encompass body, mind, and soul, making alternate breathing a holistic experience. On the physical level, cleansing the respiratory tract is paramount. This can be helpful if you suffer from an allergic condition such as hay fever or asthma. Viloma Pranayama can also help prevent colds , especially during the winter months. Clearing your nasal passages also helps with your yoga practice: You can direct your breath exactly where you want it during individual asanas. Alternate nostril breathing can significantly improve the volume and thus the capacity of your lungs. The cardiovascular system can also noticeably benefit. In the mental realm, Viloma Pranayama is an exercise that can sustainably improve your concentration. If you've decided to meditate, alternate nostril breathing is a good preparation. It helps you calm down and focus on what's important. If you're feeling anxious or restless, it can give you new strength. Gathering new energies Viloma Pranayama can noticeably activate the energies in your body. Alternate nostril breathing is also known as Nadi Sodhana, or cleansing the nadis. Nadis are small energy channels in your body. It is said that you have 72,000 of them. Through alternate nostril breathing, these channels are cleansed, allowing the prana to spread freely within you. The life energy that flows through you strengthens you for everyday life. Viloma Pranayama also addresses your higher chakras . Just try it out and see how alternate nostril breathing works for you and how long these effects last! Image © fizkes / 123rf.com
Salamba Shirshasana II - der anspruchsvolle, gestützte Kopfstand

Salamba Shirshasana II - the challenging, supported headstand

by Nick on Apr 15 2019
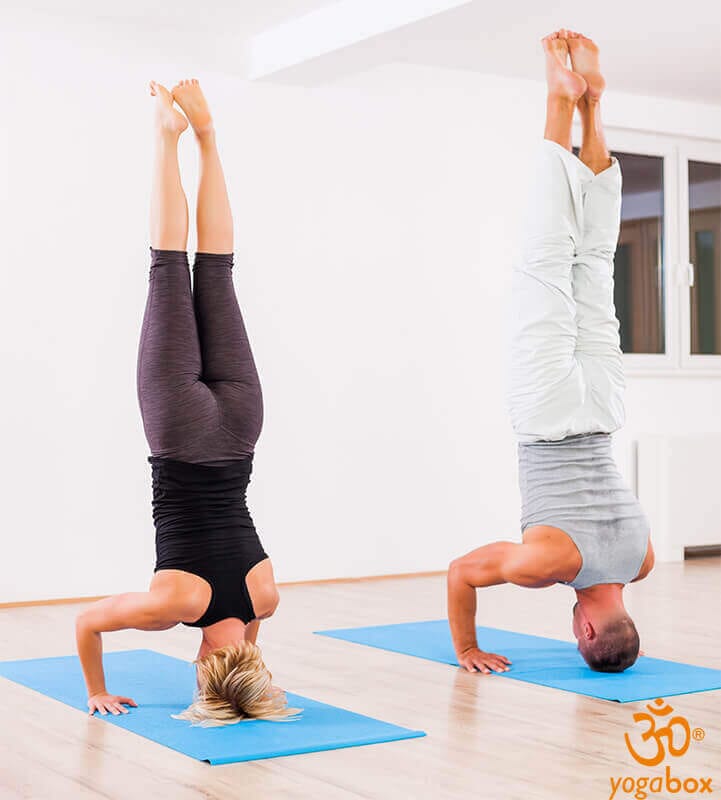
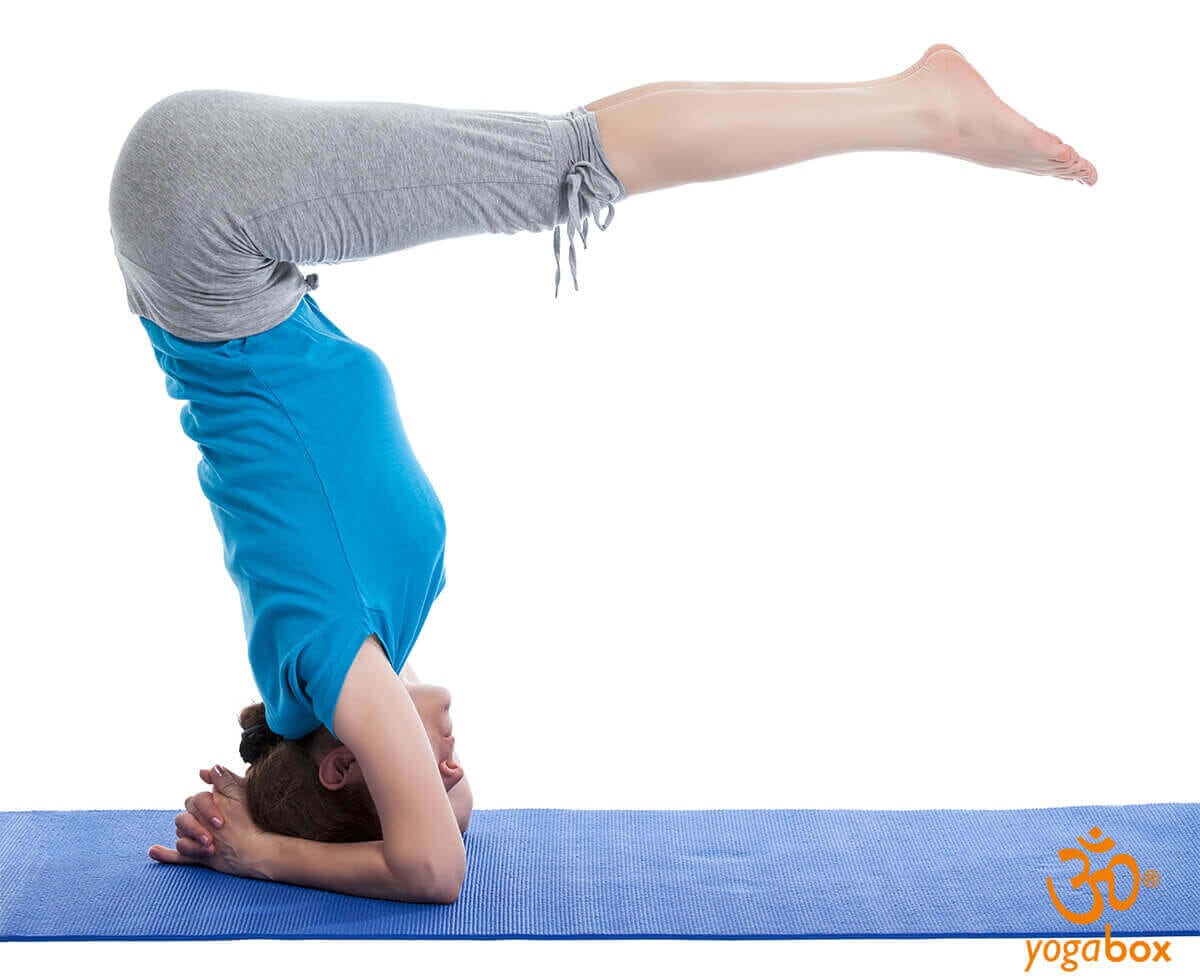
The headstand Salamba Shirshasana II is one of the most challenging asanas. Below, you'll learn everything you need to know about this yoga exercise: how it's performed, what benefits it can have, and what you should keep in mind. Salamba Shirshasana II - the challenging, supported headstand Salamba Shirshasana – what is it? Salamba Sirsasana translates as supported headstand: "Sa" means "with," "alamba" stands for support, and "sirsa" refers to the head. The pose belongs to the category of inversions. This challenging yoga exercise will literally turn your world upside down. But that's precisely where the asana's great power lies. In terms of difficulty, the asana can be described as "relatively easy" to "moderately difficult." Two yoga blocks , with your head centered between them, and a wall can provide good support and safety for beginners. How is Salamba Shirshasana performed? Before the inversion pose, warm up with standing exercises and side twists, and then get into a four-legged stance to get into the asana. Use a non-slip yoga mat and a folded blanket to cushion your head and forearms. Place your forearms on the floor with your elbows tucked under your shoulders. Press the outer edges of both wrists into the mat and roll your upper arms outwards. Place the skullcap on the floor at its flattest point. Inhale and lift your knees and pelvis. Push yourself out from your shoulder girdle and walk on tiptoes toward your head. Push your forearms toward the mat, pull your shoulder blades toward your back and pelvis, and lift your thighs. Work your way toward your torso. Your upper body should be almost vertical, and your feet should be off the floor. Activate your abdomen and pelvic floor, bend your legs slightly, and slowly raise your thighs vertically as you exhale. Stretch the balls of your feet upward. Pull the outsides of your arms toward your center and push your forearms and wrists down. Most of your weight rests on your forearms and shoulders, with only a little weight on your head. Therefore, keep your arms and shoulders active. Point your toes and pull your tailbone toward your feet. Your legs will almost automatically rise. Don't jump or use momentum. At first, stay in this position for a maximum of ten seconds and gradually increase the time until you can hold the headstand for about four minutes. To come out of the asana, reverse the movement: To release, bend your legs slightly and place your feet on the floor one after the other as you exhale. Lower one leg first, then bring your second leg up halfway. Now rest in the Balasana pose for a few minutes. Place your hands next to your buttocks and relax your neck. As a beginner, you can practice Salamba Shirshasana about ten centimeters from a wall. However, the goal should be to practice the asana without a wall. Important prerequisites for this are well-trained muscles and ideal technique. Make sure your breath flows smoothly at all times. What positive effects can Salamba Shirshasana have? The good thing about the supported headstand is that it is an optimal exercise for the whole body and stimulates several parts of the body. This applies especially to the neck, shoulders, arms and torso. The asana is beneficial for the spine. The lumbar spine in particular is relieved, which benefits the intervertebral discs. The pent-up blood flows towards the middle of the body, which is said to help against varicose veins. The intestines can be freed from constipation and the hormonal balance can be stimulated. In the headstand, blood flow to the scalp is also improved. This is said to reduce hair loss. The facial skin also receives optimal blood flow, so that the face appears rosy afterwards. The headstand can help improve vitality, concentration, memory, self-confidence , courage and creative thinking. Conclusion Salamba Shirshasana can have many positive effects, both physically, mentally, and energetically. If you have neck problems, spinal injuries, high blood pressure, heart problems, retinal detachment, or other eye conditions, or are pregnant, you should consult a doctor to determine whether the exercise is suitable. Image © djoronimo / 123rf.com
Supta Baddha Konasana - Entspannung für Schwangere

Supta Baddha Konasana - Relaxation for pregnant women

by Nick on Mar 19 2019
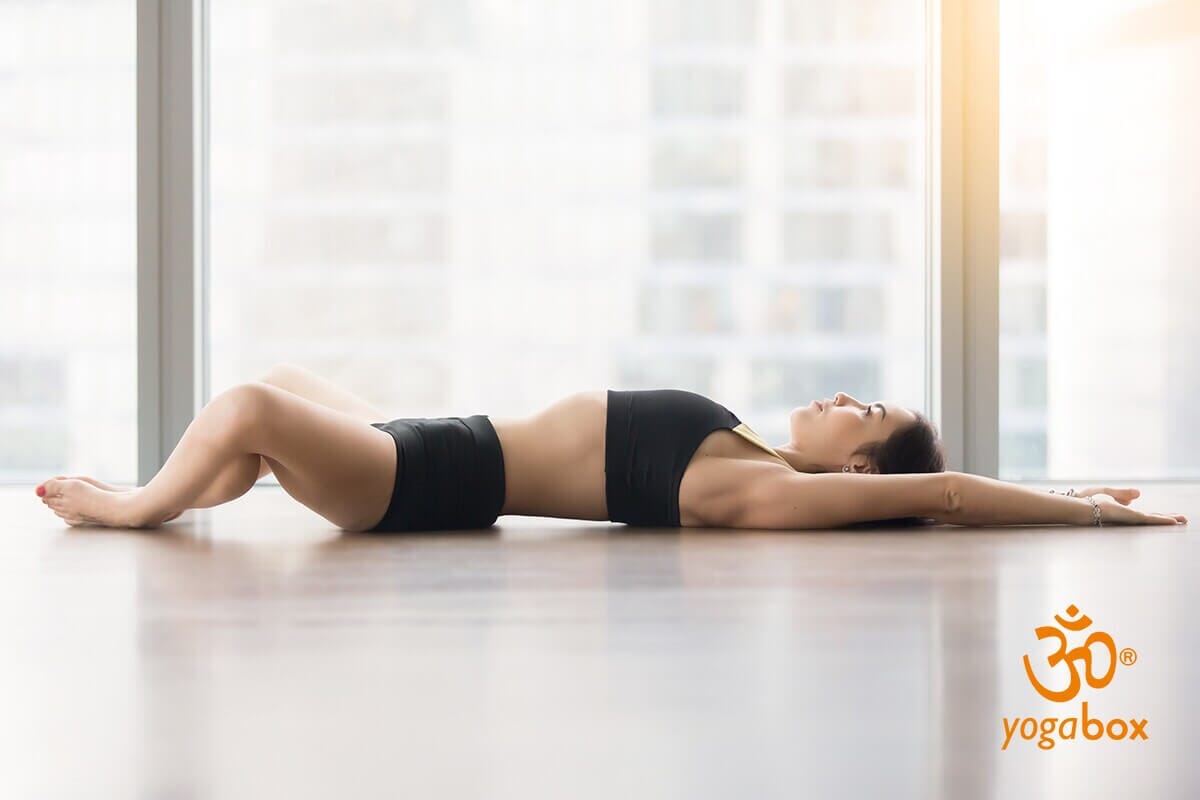
Yoga is known to offer a wide range of relaxation options. This is especially important during pregnancy, when your body needs additional strength and balance. The "Reclining Butterfly" pose, known in Sanskrit as Supta Baddha Konasana, can help you achieve this. The exercise focuses on your breathing, mobility, and flexibility . Supta Baddha Konasana - Relaxation for pregnant women Correct execution of the position For Supta Baddha Konasana, you'll first need a mat and a yoga bolster . Position this bolster approximately in the center of your yoga mat. Take enough time for this pose and make sure you can perform it without distractions. Begin by sitting on the mat with your back to the yoga bolster. Lean back so that your head and back are relaxed. Keep your legs loosely bent at first. Let your knees fall to your sides. Make sure the soles of your feet are together. Place your arms relaxed beside you with your palms facing up. If you can't place your knees on the mat, no problem. For support, you can pull two blocks closer and place them on top. This is also recommended if you have problems with your knees, hips, or groin area. You have now reached the full Supta Baddha Konasana pose. Enjoy letting yourself drop into the pose. Breathe calmly and relaxed. For the exercise to unfold its full effect, it's worth staying in it for up to five minutes. Pay attention to your individual sensations and your breathing. You should wait for at least five deep breaths. Release the pose if your breathing is no longer calm and even. Also, discontinue Supta Baddha Konasana if lying on your back becomes uncomfortable due to your belly. This can happen in the last stages of your pregnancy. The expected effect of Supta Baddha Konasana On a physical level, the pose supports you in opening your chest and the front of your shoulders. It also helps you gently stretch your inner legs and adductors. Supta Baddha Konasana can also contribute to stimulating the lung, liver, and heart meridians. This plays an important role in maintaining the desired flow of energy. On an emotional level, the pose can help you achieve a gentle and regenerative opening of the heart. Possible benefits during pregnancy Supta Baddha Konasana combines relaxation, gentle stretching, and calm breathing. This opportunity to let go and recharge your batteries can help prepare you for childbirth. The position you assume with your body creates space for your breathing. This posture also makes room for your baby. The exercise can relieve discomfort associated with pregnancy and strengthen you physically and mentally. The fact that it relaxes the back is particularly beneficial in the later stages of your pregnancy. The gentle bend creates a balance to other strains and can relieve pressure on your spine. Since the exercise is said to relieve stress, anxiety, and depression, it can make a valuable contribution during and after your pregnancy. As you can see, Supta Baddha Konasana offers a wealth of potential to guide you through your pregnancy. It can help you enjoy your pregnancy to the fullest and take some time out from time to time. Thanks in no small part to the props used, Supta Baddha Konasana can be performed by even yoga beginners. It's also a good choice if your usual yoga routine is no longer possible or recommended due to pregnancy. Find more inspiration and tips for yoga for pregnant women here. Draw your own strength and look forward to the birth of your child. Image © fizkes / 123rf.com
Virabhadrasana III - der Krieger III

Virabhadrasana III - the warrior III

by Nick on Mar 06 2019
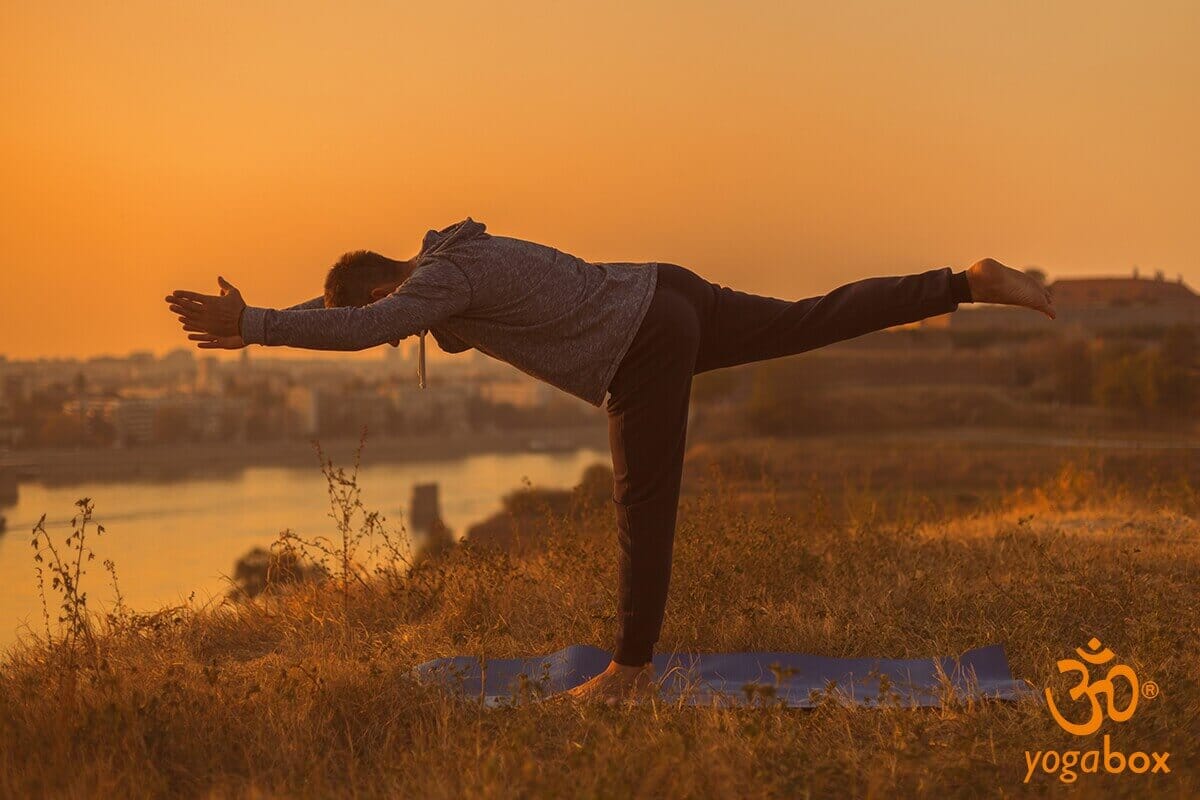
Virabhadrasana III, Yoga Warrior III, also called "Hero," is a yoga pose that requires considerable concentration, strength , effort, stability, focus, and balance. However, with a little patience, even beginners can master it and reap the benefits. Learn what these poses are and how to perform Virabhadrasana III. Virabhadrasana III - the warrior III What does Virabhadrasana III mean? There are three variations of Warrior Pose. Each is physically and mentally challenging. Warrior 1 is an integral part of the Sun Salutation. Warrior 2 is also performed in almost all classes, while Warrior 3 is more commonly used in advanced yoga classes. Virabhadrasana III is a yoga pose that refers to the courageous warrior Virabhadra. But you don't have to worry that it has anything to do with war or violence. Instead, imagine Virabhadra as a hero, as the asana is sometimes called that. This yoga pose is more about spiritual "battle." The warrior pose helps ward off ignorance and ignorance, which are often seen as the cause of great suffering. How is Virabhadrasana III performed? The Warrior is a standing yoga pose that has a strengthening, mobilizing, and grounding effect. It is somewhat reminiscent of the scales familiar from physical education classes: You balance on one leg and extend the other behind you. Your body weight is shifted onto your right leg. You need tension in your core to maintain balance. Place your arms on your hips, pointing forward. Focus on your breathing. Make sure it's gentle and calm. Now your upper body moves forward and your back leg rises until both legs are parallel to the floor. The hovering leg is no higher than your hip. Bring your arms forward until they are parallel and shoulder-width apart. Inhale. Your standing leg is long, but your knees aren't fully extended. Activate your foot and leg muscles for a secure stance. Breathe in and out slowly ten times. To exit the asana, lift your chest and lower your leg again. On the next exhalation, lower your arms. After a short relaxation phase, repeat the exercise on the other side. Focus on your breathing throughout the entire exercise. Make sure it's gentle, calm, and even. If you're a beginner and still feeling a bit unsteady on your feet, you can also support yourself with your hands on a block and press the foot of the leg you're extending backward against a wall. What can you achieve with Virabhadrasana III? Finding a stable position trains coordination, flexibility, strength, and stability throughout the body. Virabhadrasana III strengthens the back of the body, as well as the shoulders, thighs, and calves. The pose builds leg strength. It stretches the chest muscles, making them more flexible, and opens the lungs. Digestion can also be stimulated. Mentally, the asana helps you improve your concentration, inner strength, and stamina. This challenging pose is about finding peace, experiencing lightness, and not allowing yourself to be cluttered by countless thoughts in your head. Summary Virabhadrasana III, Warrior III, is a standing pose intended more for advanced yogis. This dynamic pose stabilizes the entire body. It promotes inner strength, concentration, and balance. It harmonizes and grounds. When performing this asana, do not push yourself beyond your limits, otherwise you will miss the benefits. Virabhadrasana III is not recommended for people with high blood pressure or knee or lower back pain. Image © inesbazdar / 123rf.com
Marichyasana II - aus der Verdrehung in Flexibilität und Wohlbefinden

Marichyasana II - from twisting to flexibility and well-being

by Nick on Feb 26 2019
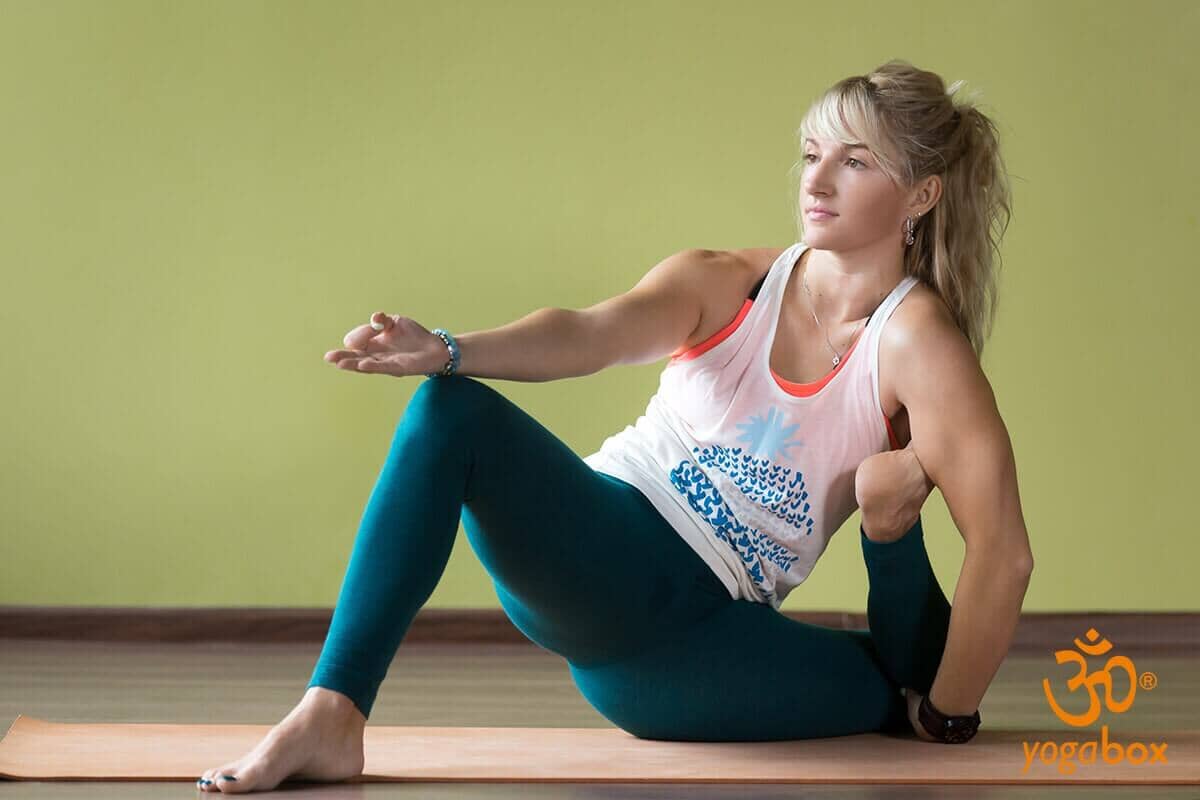
The thoughtful Marichyasana II pose is an asana that promotes hip mobility, stretching, and concentration. Thanks to its interesting twists, it's a worthwhile practice for both beginners and experienced yogis. This guide will explain the benefits of Marichyasana II, how to enter the pose, and why you can incorporate the exercise so seamlessly into almost any yoga sequence. Marichyasana II - from twisting to flexibility and well-being To the glory of the wise - the (hidden) wisdom of this asana Unlike many other asanas, Marichyasana II is not named after a metaphorical posture, but after the sage Marichyasana himself. This pose is dedicated to the son of Brahma and grandfather Manu, and in his honor, you fold yourself into a small and humble pose. The basis for assuming Marichyasana II is Dandasana, the Stick Pose . Since Marichyasana II is not a symmetrical position, you first choose one side to perform the exercise on. In this guide, it is only described for one side; the other side is performed analogously. First, pull your right leg into the half lotus position and then pull the left leg back as far as you can (as in Marichyasana I). Now inhale slowly and with control, using the impulse of the inhalation to raise your left arm and stretch your entire left side of the body. As you exhale, lower your left arm and grasp your left shin from the inside. Wrap your left arm around your leg, keeping your shin in your armpit. Move your right arm behind you and grasp the wrist of your left arm. If you can't reach your wrist, try to at least connect your hands at the fingertips and achieve a close grip. With each inhalation, push your wrists further and further toward the yoga mat . Now slowly lift the sides of your torso and extend your torso well beyond your resting right leg. At the same time, lower your chin further toward your right knee. Hold this asana for a few seconds, ensuring your breath flows smoothly and your posture is relaxed. With each exhalation, you allow gravity to continue to work. End this asana with a deep inhalation and, as you exhale, move your legs and upper body back into Dandasana. Now assume the pose on the other side. Benefits and Variations of Marichyasana II To further perfect this asana and make it even more effective, you should pay attention to a few specific points. In Marichyasana II, draw your inner thighs and abdominal muscles deep into your body to achieve an even stronger fold. Push your pubic bone toward your raised knee and your sternum toward your pubic bone. This requires a great deal of inner and physical flexibility and is a final goal of the exercise. Especially at the beginning, you shouldn't force the extreme stretch and fold, but rather use Marichyasana II to improve your posture with each breath. If you have trouble bringing your hands together behind your back—especially at the beginning—we recommend using a rubber band or piece of rope. This will allow you to still apply the desired tension to your shoulders and slowly work your way into a better position. You'll notice the physical effects of Marichyasana II as you perform it; the stretch in your hips, thighs, and shoulders, as well as the twisting of your spine, can feel truly relaxing. This asana is a welcome change for the body, especially when you're under a lot of stress or spend long hours sitting at work. Marichyasana II can also help with shoulder problems, as it twists and activates the shoulder girdle. Through Marichyasana II, you can also experience a heightened sense of well-being and more energy, while simultaneously calming and synchronizing your body and mind. This asana is perfect for a calm ending and a high degree of flexibility, especially after an intense workout. Image © dimol / 123rf.com
Urdhva Dandasana - Anspruch und Lohn der nach oben gerichteten Stockhaltung

Urdhva Dandasana - Demand and reward of the upward facing stick pose

by Nick on Feb 23 2019
Urdhva Dandasana is a pose that, when performed perfectly, not only looks stunning, but also requires a great deal of coordination, a bit of strength, and, above all, discipline. You may simply lose your balance the first few times you attempt this asana. However, it's worth learning Urdhva Dandasana and having a partner continually correct your perfect posture. This asana can be particularly effective against the typically tense back and neck area of our Western world. Of course, the demands on your back are correspondingly high – you can learn how to achieve the perfect posture here. Urdhva Dandasana - Demand and reward of the upward facing stick pose Dandasana twisted upwards The Stick Pose Dandasana is a pose that is easy to learn, even for beginners. You should first have mastered this asana effortlessly before attempting the Upward-Facing Stick Pose. Not to mention that Dandasana is a basic pose from which you can assume many other asanas. For Dandasana, simply sit centrally on your mat with enough distance between you and all walls, with your legs together and your toes pointing upwards. Reach your hands lightly behind your bottom to the floor, touching and feeling the mat beneath you, with your fingertips pointing forwards. By pressing your hips forward and pulling your toes towards you, you straighten your spine and open your body. The Upward-Facing Stick Pose is essentially a very similar pose, only rotated 180 degrees. Your foundation here is your hands, elbows and head. You start in the same way in the Yoga Headstand Salamba Sirasana , which you should also master without any problems. So practice this asana first to be able to stand steadily. Especially at the beginning, you should first assume Salamba Sirasana and be able to hold the position for a few seconds. From there, lower your legs slowly and with control. The goal is to keep your legs almost parallel to the floor. Be careful not to put too much tension in your toes and keep your legs as close together as possible. This requires a little more concentration and balance, but it makes your execution of Urdhva Dandasana significantly cleaner and more focused. You'll feel the latter immediately. If you're already advanced and have sufficient balance and strength, you can skip Salamba Sirasana on the way to Urdhva Dandasana. Instead of lifting and lowering your legs straight up, immediately bring them into a position parallel to the floor. Use a partner or teacher to adjust your posture until you get a feel for the perfect leg position. Since you'll be lying upside down, it's especially important to proceed slowly and with control to avoid subjecting your cervical spine to any sudden movements. The effect and goals of the upward stick position Like all asanas in which your legs float above your head, Urdhva Dandasana helps improve and stimulate blood flow throughout your body. You can also feel this blood circulation in the head in the form of circulating and stimulating energies, which is often experienced as very stimulating. However, be careful not to overtax your circulation, especially if you're already feeling under the weather. Urdhva Dandasana is a very demanding asana and deeply challenges many muscle groups, especially those that perform supporting and stabilizing functions. You'll quickly feel the strain, especially in your lower back and core, as these muscle groups balance the position of your legs. Your biceps, triceps, and neck are also engaged, as they must stabilize the vertical posture of your back. Overall, Urdhva Dandasana is an exercise that fits perfectly and seamlessly into various yoga sequences and can help strengthen your back and improve your posture in the long term. Image © dimol / 123rf.com
Virabhadrasana I - der Krieger I - für mehr Entschlusskraft und Selbstbewusstsein

Virabhadrasana I - the Warrior I - for more determination and self-confidence

by Nick on Feb 19 2019
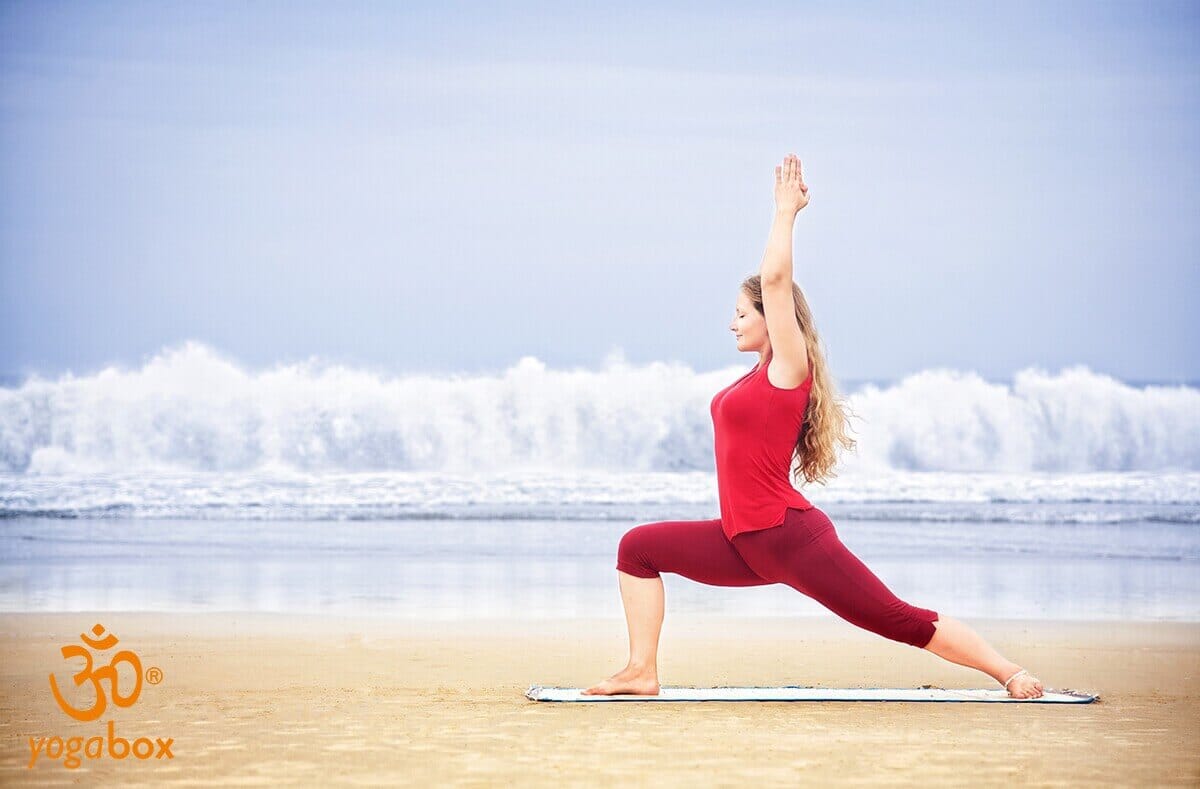
There are three variations of Yoga Warrior, all of which are very powerful. Virabhadrasana I, or Warrior I, is known as the pose of the good hero. The goal of this asana is to strengthen the thigh and gluteal muscles, build inner strength, and increase determination. You can practice this standing pose in the Vidya basic series, initially after Sun Salutation, or at the end after Trikonasana (Triangle) . Virabhadrasana I can also be practiced by yoga beginners, but is considered an intermediate yoga exercise. You will now learn how to perform the exercise and what to keep in mind. Virabhadrasana I - the Warrior I - for more determination and self-confidence Virabhadrasana I - Warrior Virabhadrasana I - what exactly is behind it? Virabhadrasana I, a standing pose, was named after a warrior from Indian mythology . The word Virabhadrasana is derived from Virabhadra, the hero who plays an important role in South Indian mythology. He fights for good. The starting position for all the poses in the hero series is the tree pose. Many people feel more confident through this asana. The power in this yoga pose comes from a standing position. It is channeled into your arms and beyond. How to perform Virabhadrasana I? Step-by-step instructions: Stand upright and take a big step about one leg length apart. Step your right foot back. Stand in a lunge position with your hips pointing forward. Turn your back foot outward about 60 degrees. On the next exhale, bend your front leg . Place your feet shoulder-width apart, with your knee directly over your ankle. The swords, symbolized by the powerfully upwardly stretched arms and hands, pursue the goal of gaining determination and energy and of growing beyond oneself when performing the exercise. Your arms should be parallel to each other, with your palms facing inward. If you have shoulder pain, your arms don't have to point upward. You can also hold them outward. Don't tense your shoulders; keep them relaxed. Lean your head back, look down at your hands, and breathe in and out calmly. Stay in Virabhadrasana I for 30 to 60 seconds. If you have neck problems, you can also look forward instead of up. To exit the asana, place your arms on your hips, take a small step forward with your back foot, exhale, and relax your arms beside your body. Then repeat Warrior I on the other side. Virabhadrasana I requires concentration, inner calm, and stamina. If you tend to arch your back, make sure you raise your arms to the sides above your head. This will make it easier to keep your back straight. Make sure you breathe consciously. What physical and mental benefits can you achieve with Virabhadrasana I? Raised arms create more determination, energy, stamina, and self-confidence. They can help you surpass yourself. Virabhadrasana I also stretches the shoulders, back, neck, abdomen, and groin. It can also improve balance and equilibrium, increase endurance, and strengthen the lungs. The latter results from expanding the chest, thus supporting deep breathing. Stretching the arms increases breathing volume. Virabhadrasana I is also said to be an excellent preventative measure against osteoporosis, stimulate the metabolism, help with digestive problems, and reduce fat around the hips. Conclusion Virabhadrasana I has a strengthening, harmonizing, and grounding effect. The key to success is proper posture and breath. The better you connect with the latter, the easier it will be for you to feel the warrior pose and find stability. People with a weak heart, high blood pressure, and unstable knee joints should not perform this yoga exercise. Image © byheaven / 123rf.com
Ardha Baddha Padma Paschimottanasana: Länge im halb gebundenen Lotus erleben

Ardha Baddha Padma Paschimottanasana: Experience length in the half-bound lotus

by Nick on Feb 16 2019
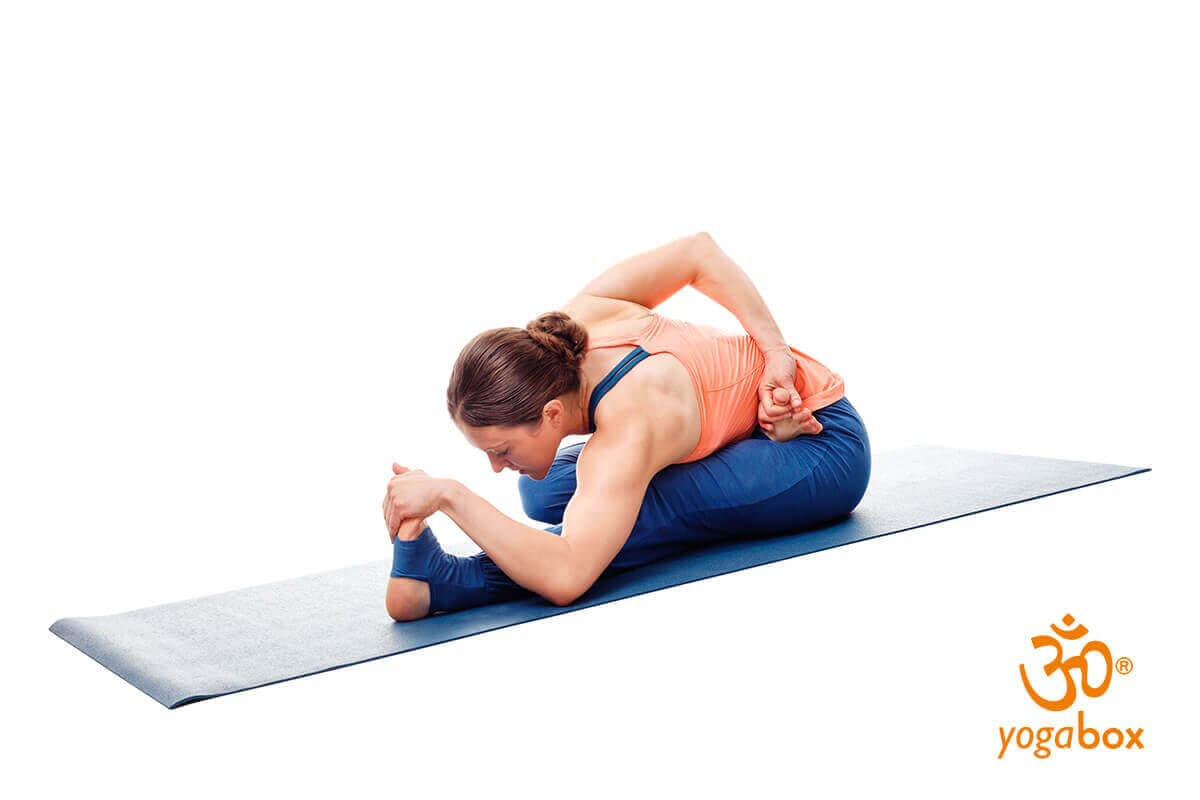
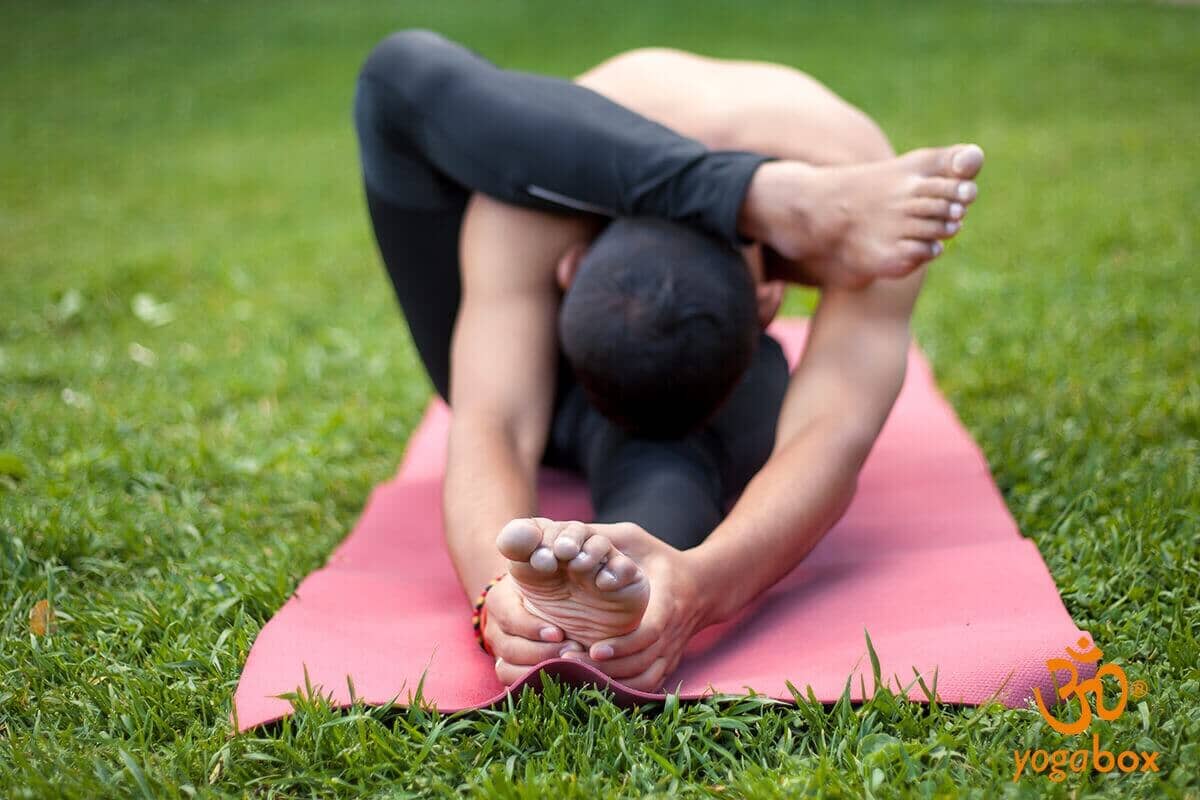
Ardha Baddha Padma Paschimottanasana is a variation of the forward bend that combines an intense stretch with a graceful appearance in a single pose. As with many other yoga poses, the Sanskrit name gives clues to the appearance of this asana: "Ardha" means "half," "Baddha" means "bound," "Padma" means "lotus," and "Paschima" means "back." Ardha Baddha Padma Paschimottanasana also contains the word " Uttanasana ." This asana, which denotes the intense stretch in the forward bend, is usually practiced in beginner yoga classes. Ardha Baddha Padma Paschimottanasana is thus a forward bend with one leg extended and the other in the lotus position. The foot of the stretched leg is grasped by the same-side hand in the forward bend, and the foot of the leg in the half lotus position is grasped by the hand held behind the back. Ardha Baddha Padma Paschimottanasana: Experience length in the half-bound lotus Your path in Ardha Baddha Padma Paschimottanasana Begin in Dandasana , sitting upright with your legs stretched out. From there, place your right leg (you will of course perform the exercise in the opposite direction later) in the lotus position on your left thigh. Make sure that the sole of your foot is pointing upwards as much as possible. This will optimally relieve the strain on your knee in this asana. Now bring your hand around your back and try to grab your right foot with it. No force! Pay attention to the limits that your body tells you to. The correct execution of Ardha Baddha Padma Paschimottanasana is more important than reaching the foot. You can also place your hand on your back. Then, consciously stretch out once more, with your upper body straight, bend over your outstretched leg on the floor and grab the foot. Now try to relax and allow yourself to allow yourself to enter the stretch, which will understandably be very intense at first. Learn about the benefits of Ardha Baddha Padma Paschimottanasana In the half-bound lotus pose, you can stimulate the activity of your liver and spleen, potentially supporting your digestion . The liver is particularly important for fat metabolism, and a well-functioning spleen can purify your blood and effectively strengthen your immune system. You can also potentially benefit from Ardha Baddha Padma Paschimottanasana for gastrointestinal problems, especially constipation. In addition to your internal organs, your musculoskeletal system can also benefit sustainably from Ardha Baddha Padma Paschimottanasana. With your legs resting on the floor, you stretch the backs of your thighs, an area where the muscles often tend to shorten. The same applies to your lower back, which, for healthy posture, shouldn't be shortened either, to avoid a hollow back. The side of the lotus position also benefits from intensive hip opening. By returning your arm behind your back, you gently rotate your upper body and can also stretch shortened chest muscles. This often occurs when we sit at a desk for long periods. Pulling your toes in also makes the involved joints more flexible. What you should pay attention to in Ardha Baddha Padma Paschimottanasana As with all other yoga asanas, the beneficial effects of the half-bound lotus pose depend on performing the exercise correctly. It's especially important to ensure that you enter the forward bend with your back as straight as possible. In the lotus position, turn the soles of your feet upward to relieve pressure on your knees. You can lower your chin slightly in the forward bend to ensure a straight and thus optimally protected cervical spine. If you have problems with your hips or knees, your yoga teacher can show you how to modify Ardha Baddha Padma Paschimottanasana for yourself or teach you an alternative pose. Image © dimol / 123rf.com
Skandanasa: Stärke in der Haltung des Kriegsgottes erleben

Skandanasa: Experience strength in the attitude of the war god

by Nick on Feb 12 2019
You may have practiced Skandasana before turning to yoga. It's a side lunge held very low. You grasp the ankle of each foot with your hands. You also rotate your torso toward the extended leg and lower your upper body onto it. There are also alternatives that make the pose easier or a bit more intense. You'll learn more about these below. The important thing to remember is that all variations have one thing in common: They offer you tremendous hip opening as well as the strength and flexibility of the War God. Skandanasa: Experience strength in the attitude of the war god How to get into the asana of the war god Skandasana Of course, your path to Skandasana can be completely individual. But if you need some inspiration, this sequence might help: Start in a wide forward bend (Prasarita Padottanasana) . From there, bend your right knee (you can do the asana in reverse later, of course) and move into a deep knee bend, the so-called half squat. While your right leg is sharply bent, your left leg remains straight. From there, lift the toes off the floor and pull them toward your body so that only your heel remains in contact with the mat. This is where the options offered by the War God pose begin. For example, flexing your feet is not absolutely necessary. If the stretch with one foot on the floor already seems very intense, or you need a stable grounding with that foot, you can stay with your whole foot on your mat. You can also choose the position of your arms. You don't necessarily have to place your hands on your ankles. For more balance, you can of course also place them on the floor for more stability. You can also place your hands in Anjali Mudra , place your elbow on the left side of your left knee and gently twist up in this way. Side positions of your arms are also possible, of course. Learn the effects of the God of War's stance Skandasana is a standing pose and also a hip opener. This already demonstrates the two main benefits that the War God asana can offer: leg strength and hip flexibility. Depending on which leg you are currently bent in the deep side lunge, you stretch the back and inner thighs, as well as your hips. Your balance is also challenged in the deep War God pose. This also leads to comprehensive strengthening of your core (the abdominal and back muscles). Tips for correct exercise execution If you have trouble balancing in Skandasana, it's helpful to stand on the ball of the foot of the bent leg. This way, you don't need to bend the leg as much. If you're already an advanced yogi, you might be interested in the following variations: For example, you can alternate between Tree Pose and Skandasana, thereby intensifying the strengthening of your legs. You can also tie both hands by bringing your right hand behind your back and joining it with your left hand. No matter how you practice Warrior Pose, it's always important to practice in opposite directions. You should also consult your orthopedist or yoga instructor if you have problems with your hips or knees. There will always be helpful alternatives in yoga. Even as an experienced yogi, always pay attention to correct exercise form. As a beginner, it's best to learn Skandasana in a beginner's class. Afterward, the exercise is also suitable for home practice, allowing you to experience the beneficial experiences that the god of war has to offer in your daily yoga practice. Image © fizkes / 123rf.com
Supta Padangusthasana: intensive Beindehnung im Liegen

Supta Padangusthasana: intensive leg stretch while lying down

by Nick on Feb 01 2019
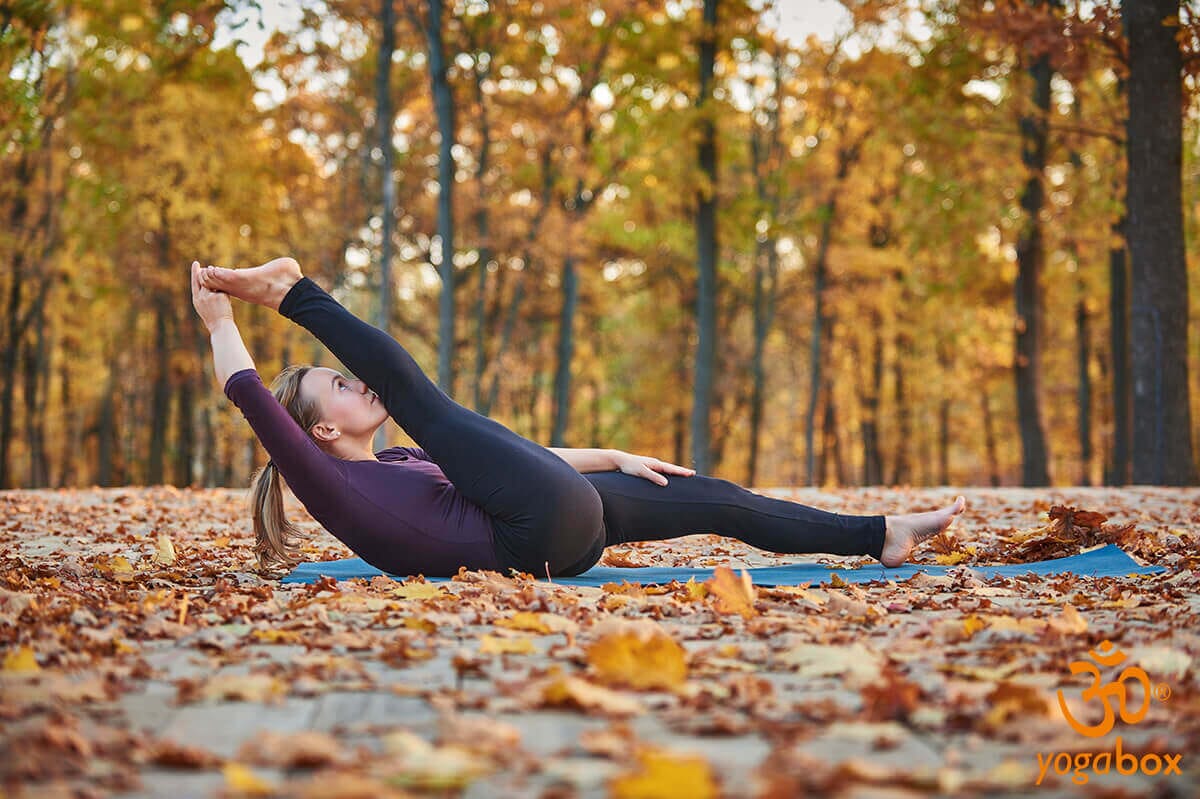
Do you sit at a computer or study at a desk all day? Then Supta Padangushthasana is the right exercise for you to relieve your strained back! Supta Padangusthasana, the reclining hand-foot pose, offers you both stretching and relaxation. Here you'll learn more about the beneficial effects of this asana, how best to perform it, and various variations. Supta Padangusthasana: intensive leg stretch while lying down Regeneration in supine position: Supta Padangusthasana The Sanskrit name of this asana also reflects the posture: "Supta" means "supine position," "Pada" means "foot," and "Angustha" means "toe." In Supta Padangusthasana, you lie on your back. Begin with your legs bent and both feet on your mat. Pull your bent right knee toward your chest (later, you will also perform this asana in reverse) and hold it there for a few breaths. Then straighten it and let the other leg slide to the floor. This leg is now stretched out on the mat; grasp the other leg with your hand near the foot, stretching the leg, foot, and toe. You can grasp either the foot or the toes, as you prefer. For an intense stretch, it is important that the toes of both legs are flexed. This means the toes are drawn toward your body. Now relax and allow yourself to enjoy the beneficial stretch. Experience the effects of Supta Padangusthasana The reclining hand-and-foot pose can offer you numerous beneficial effects if you perform this asana mindfully and respect your body's limits, which you should do with all yoga asanas. First, you'll feel an effective stretch in the backs of your thighs. You can vary this: The flexed position of your feet further intensifies the stretch of the muscles, which are often shortened in this part of the body. The gluteal muscles are also harmoniously incorporated into the stretch in Supta Padangusthasana. It's important that you perform this asana so that your lumbar spine is on the floor and that you don't arch your back. Then you'll quickly notice that Supta Padangusthasana can help you relax your lower back. This is particularly beneficial after a stressful day at work, and you could incorporate it into your daily evening yoga routine. The hand-foot pose may be a helpful exercise for you if you have problems with the sciatic nerve , which runs from your lower back across your buttocks into your right or left leg (you can also recognize sciatic pain by its path). To be on the safe side, however, you should inform your doctor, such as an orthopedic surgeon, about your yoga practice beforehand. Information about your sciatica problems is also important for your yoga teacher, as they can then pay particular attention to ensuring that you're performing Supta Padangusthasana correctly. Supta Padangusthasana has even more to offer: By consistently engaging your core in this asana, you also strengthen the small muscles around your lumbar spine, which can provide valuable stabilization in this often very vulnerable area of the back. By engaging, you also stimulate the organs located in this area. This is especially interesting for female yogis, as the pose can potentially help you cope with period pain. What you should pay attention to in Supta Padangusthasana In the hand-foot pose, the lumbar spine remains on the floor. This is the most important thing to remember. Even when stretching, be mindful of the limits your body imposes. You don't have to grab the foot of your leg when it's off the floor if that's impossible with the leg straight. Feel free to grab your leg by the calf or thigh. We know numerous props from Iyengar yoga . In Supta Padangusthasana, you can place a strap around your foot and experience an intense stretch tailored to your individual needs, while keeping your back properly grounded to the mat. Image © sandsua / 123rf.com
Parivritta Paschimottanasana - die Vorwärtsbeuge

Parivritta Paschimottanasana - the forward bend

by Nick on Jan 20 2019
Parivritta Paschimottanasana - the forward bend Parivritta Paschimottanasana is composed of the Sanskrit words "paritvritta," "paschima," "uttana," and "asana," which translates as "intense stretching of the back of the body." This asana was first described by Swami Swatmarama in the 14th century and remains one of the fundamental asanas in Hatha Yoga to this day. How to perform Parivritta Paschimottanasana Sit on your yoga mat with your legs stretched out and try to point your toes towards you. Place your palms firmly on the mat next to your hips, fingers pointing towards your feet. Extend your arms straight, keeping your back straight. Wait for your next inhale and then extend your arms vertically out to the side. As you exhale, bend your back forward. Maintain a straight posture and bend from the pelvis. Stretch your hands forward. To do this, reach over your toes from above; alternatively, you can place your big toe between the first three fingers of your hand. If you are new to yoga, for Parivritta Paschimottanasana, simply place your hands on your shins. Don't stress about reaching as far forward as possible. Simply place them wherever your hands land. Just make sure your back is as straight as possible. On your next inhalation, stretch forward again; on your exhalation, draw your upper body further forward. Open your arms so that your elbows point out to the sides. You can increase the stretch in Parivritta Paschimottanasana by resting your forehead as completely as possible on your knees and clasping your feet with your hands. If your thigh muscles are tense, draw your torso forward. The backs of your legs and the backs of your knees should rest firmly on the yoga mat, and your shoulder muscles and neck should be relaxed. As you inhale, lift your head off your knees; as you exhale, relax the muscles again. To come out of Parivritta Paschimottanasana, stretch your arms and spine as you inhale, then slowly release, vertebra by vertebra. The physical effects of Parivritta Paschimottanasana If you're new to yoga, you can place a pillow or a folded blanket under your buttocks to keep your back straight and stable. You may find it helpful to support the stretch in Parivritta Paschimottanasana with a strap placed around your feet. This asana activates your abdominal area and has a strong stimulating effect on your internal organs. Parivritta Paschimottanasana can help improve your digestion. It has also been repeatedly reported to stimulate and strengthen the kidneys and the immune system as a whole. The intense stretch and the back extensors mobilize the entire spine. Hamstrings, as well as the calf and gluteal muscles, can also become more flexible if the asana is practiced regularly. In addition to activating the central median, the pelvic area is well supplied with blood when performed correctly. Ancient texts state that Parivritta Paschimottanasana can not only increase general vitality, but especially blood flow to the genitals. Energetic and mental effects of Parivritta Paschimottanasana If Parivritta Paschimottanasana is held for a long time, this asana unfolds its full energetic potential. It can open Sushumna or Paschimottha Nadi, the so-called subtle spine. Especially in the forward bend, all the chakras are activated, but especially Manipura, the solar plexus or solar plexus chakra . This chakra is one of the main energy centers in the body. Opening through Parivritta Paschimottanasana is said to dispel fear and insecurity. The solar plexus chakra is generally associated with self-confidence, self-awareness, and the meaning of life. In advanced yogis, Parivritta Paschimottanasana can activate the Kundalini. On a mental level, the flow of thoughts is calmed by the asana. Patience, perseverance, and the ability to let go are qualities that are also strengthened. Furthermore, the development of devotion, humility, and forgiveness is encouraged. Image © ddkolos / 123rf.com
Astavakrasana: mit den acht Winkeln schweben

Astavakrasana: floating with the eight angles

by Nick on Jan 15 2019
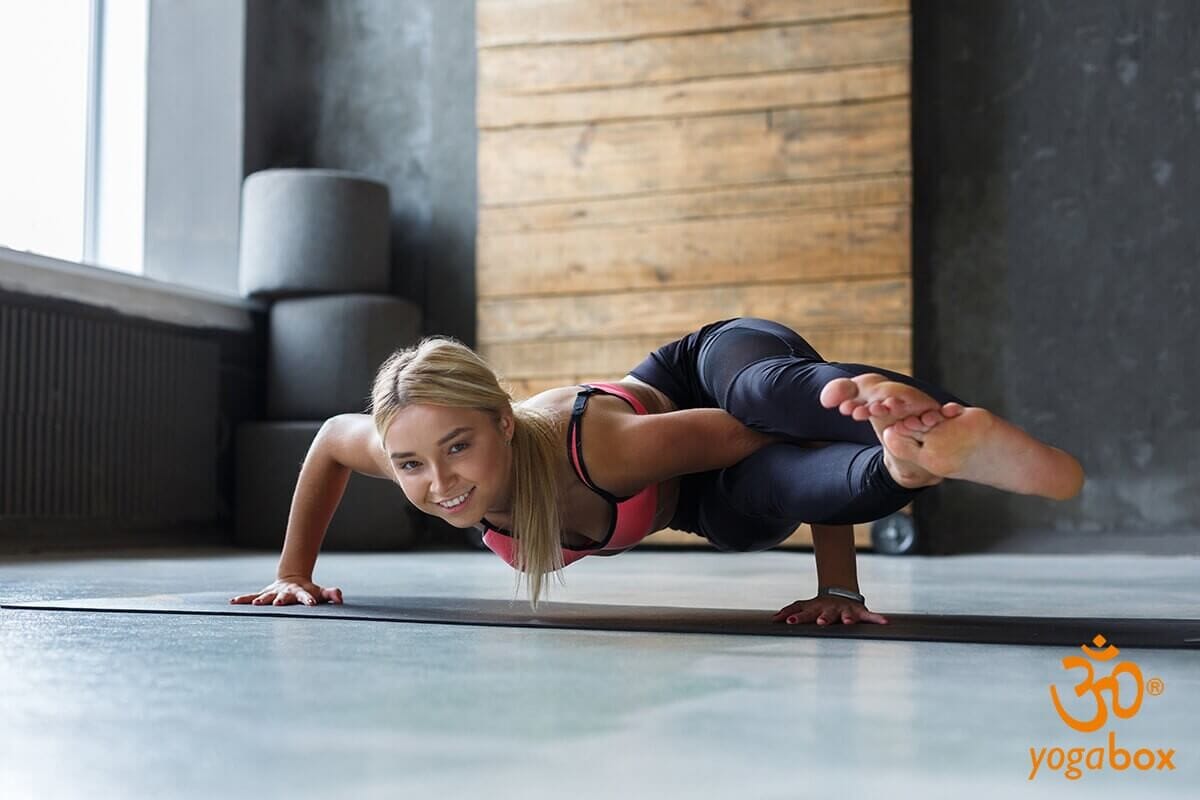
Astavakrasana: floating with the eight angles If you browse yoga magazines or read online yoga articles, this is a pose you'll often spot in the accompanying images: Astavakrasana seems to completely defy the laws of gravity and therefore exerts something utterly fascinating on us. The practitioner stands on their two hands, which are firmly grounded in the floor. Both legs float stretched out to the side, parallel to the floor, one above and the other below the same shoulder. How does that work? This question inevitably arises when the viewer gazes at the pose, incredulous and amazed. Here you'll learn how to learn Astavakrasana and what effects this beautifully aesthetic asana has to offer. From Ashtanga As you can easily see, Astavakrasana is one of the arm balances. The Sanskrit name, as is often the case, illustrates what a yoga pose is all about. "Asta" means "eight," and "vakra" means "angle" or "bend." The exercise is a pose for advanced practitioners and is classified as Ashtanga Yoga . Holistic exercise If you want to practice Astavakrasana, the most important thing is to block out thoughts of physical and mental weaknesses. Doubts about the strength of your arms, your ability to maintain balance, or simply the thought "that's impossible" are misplaced. For this exercise, as in life, you need confidence. If we believe in our abilities and have self-confidence, we can achieve a lot in our daily lives and at work. This is precisely the message this asana is intended to convey to you. So get to work! Your path to Astavakrasana You begin in Stick Pose (Dandasana) , which is an upright seated position with your legs stretched out. Pull your right knee close to your chest. Press both palms firmly into the floor, with your right shoulder placed in front of your right leg. Your thigh rests against the back of your upper arm. Pull your shoulder blades together and tighten your core. Using the strength in your hands, push yourself off the floor and lift your hips and legs. Move your left leg to the right so that it hovers over your right leg. Now bend forward to create a 90-degree angle in your elbows. Both legs are strong and press against your arm from above and below, respectively. Hold the pose and then repeat on the other side. The effects of Astavakrasana The main message of the exercise has already been mentioned: Have the courage to make the seemingly impossible possible, and trust yourself! Mentally, the eight-angle asana can help you reduce anxiety and stress, as well as strengthen your concentration and both your inner and outer balance. Physically, you primarily train the strength in your wrists and shoulders. You also tone the abdominal muscles. This exercise can help alleviate discomfort during menstruation or during menopause . Furthermore, you maintain a harmonious connection between mind and body, supported by your conscious breathing. This exercise allows you to grow a little bit at a time. Preparing for your path to Astavakrasana Good preparatory exercises for the eight-angle arm balance in yoga are the forward bend in Uttanasana , the hip opening of Baddha Konasana , or the strength you experience in Chaturanga . You can also practice balance well in the Crow Pose Bakasana. You can also support yourself with bolsters under your hips and outer leg during your first attempts at Astavakrasana. Your yoga teachers know other ways to support yourself, so the path to this asana may be quicker than you think. Note: If you have shoulder or wrist problems, you should incorporate alternative asanas into your yoga practice! Image © milkos / 123rf.com